Article Plan: Temp Spike Manual
This manual details temperature spikes, covering definitions, common causes like post-operative states and vaccinations, physiological variations, and crucial guidance on when to seek immediate medical evaluation.
Temperature spikes represent a common clinical challenge, often prompting anxiety for both patients and healthcare providers. These isolated instances of elevated body temperature, without immediately apparent cause, require careful consideration. Understanding the nuances of these spikes – differentiating between benign, self-limiting events and indicators of underlying pathology – is paramount for appropriate management.
Frequently, a single temperature elevation doesn’t signify a serious illness, particularly post-surgery or following vaccination. However, dismissing a spike outright can be detrimental. The body’s temperature regulation is a complex process, influenced by numerous factors, including circadian rhythms and inflammatory responses.
This section will lay the groundwork for interpreting temperature spikes, emphasizing the importance of a holistic assessment. We will explore what constitutes a significant increase, normal temperature variations, and the common scenarios where isolated spikes are observed, setting the stage for a detailed discussion of diagnostic approaches and management strategies.
Defining a Temperature Spike
A temperature spike is generally defined as a sudden, temporary increase in body temperature above an individual’s normal baseline. While a fever is a sustained elevation, a spike is more transient, often resolving within hours. However, determining what constitutes a “significant” increase requires context. A temperature of 38°C (100.4°F) is often cited as a fever threshold, but individual baselines vary.
Normal body temperature isn’t a fixed number; it fluctuates throughout the day – a phenomenon known as diurnal variation. Factors like activity level, time of day, and even menstrual cycles can influence temperature. Therefore, a slight elevation might be physiologically normal for one person but indicative of illness in another.
Understanding these variations is crucial. A spike isn’t solely about the absolute temperature; it’s about the change from a person’s usual state. Careful monitoring and consideration of accompanying symptoms are essential for accurate interpretation.
What Constitutes a Significant Increase?
Determining a “significant” temperature increase isn’t simply about reaching a specific number like 38°C (100.4°F). It’s relative to the individual’s normal baseline temperature. A rise of even 1°C (1.8°F) above a person’s usual temperature can be noteworthy, especially if accompanied by other symptoms.
The rate of temperature increase also matters. A rapid spike is often more concerning than a gradual rise. Furthermore, the context is vital; post-operative patients may experience expected temperature fluctuations due to the inflammatory response.
Isolated spikes, even reaching 38°C, can sometimes be physiological, particularly due to inflammatory responses to foreign material or tissue damage. However, any unexplained or persistent elevation warrants investigation. The temperature itself doesn’t fully reveal the severity of illness; some viruses cause higher fevers than others.
Normal Body Temperature Variations
Defining “normal” body temperature is more complex than a single value. While 37°C (98.6°F) is often cited, individual baselines vary. Temperature naturally fluctuates throughout the day, typically peaking in the late afternoon and reaching its lowest point during sleep. This is known as diurnal variation.
Factors like activity level, metabolism, and even the time of the menstrual cycle can influence body temperature. It’s crucial to establish a patient’s typical temperature range to accurately assess a spike. A slight elevation within an individual’s normal range isn’t necessarily cause for alarm.
Furthermore, measurement method impacts readings; oral, rectal, axillary, and tympanic temperatures differ. Understanding these variations is essential for proper interpretation and avoiding unnecessary concern over minor fluctuations.
Common Causes of Isolated Temperature Spikes
Isolated temperature spikes, without accompanying symptoms, are surprisingly frequent, particularly post-surgery or vaccination. Following major bowel surgery, clinicians must consider potential complications like anastomotic leaks or collections, even in the absence of overt infection signs. These can sometimes present subtly, even with only heart failure symptoms.
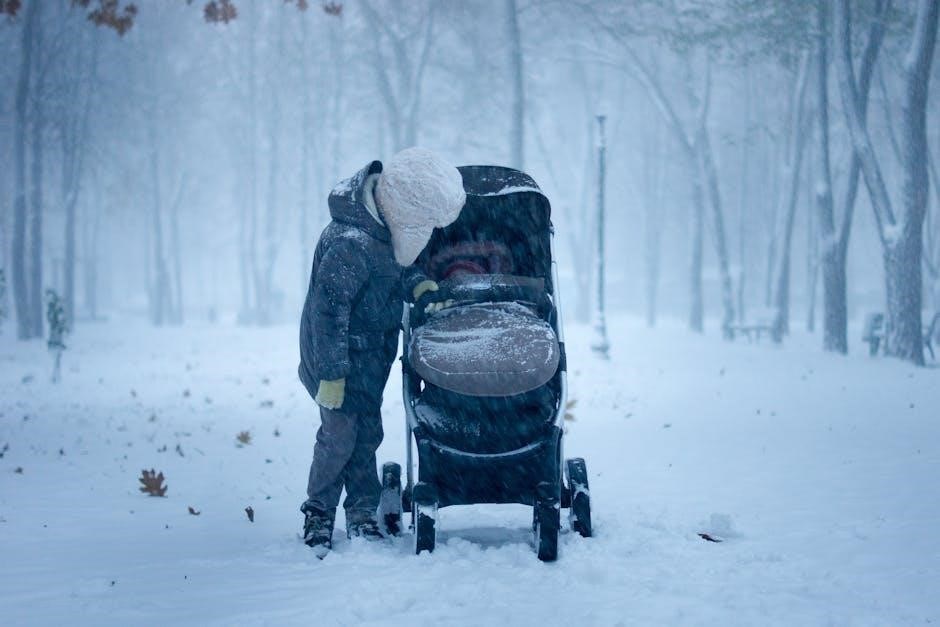
Post-vaccination fever is a well-recognized phenomenon, as the immune system mounts a response. In children, a fever with no other symptoms can also occur, often causing parental anxiety, but is frequently benign. Physiological responses to foreign materials introduced during procedures, or inflammation from tissue damage, can also elevate temperature.
It’s important to remember that a temperature of 38°C (100.4°F) can sometimes be a normal physiological response.
Post-Operative Fever
Fever is a common occurrence after surgery, representing the body’s natural inflammatory response to tissue trauma and the surgical process itself. However, isolated fever spikes post-operatively warrant careful consideration, as they can signal underlying complications. A key concern is the possibility of anastomotic leaks – particularly after bowel surgery – where a connection between intestinal segments fails, leading to internal leakage.
These leaks don’t always present with classic infection symptoms; one case involved a patient exhibiting only new-onset atrial fibrillation, ultimately diagnosed via CT scan. Collections of fluid, such as abscesses, can also develop post-surgery and cause fever. The inflammatory response to the introduction of foreign materials (sutures, implants) contributes to the post-operative temperature elevation.

Anastomotic Leaks & Collections
Post-operative fever should prompt consideration of anastomotic leaks, especially following major bowel surgery. These leaks, representing a failure of the surgical connection, can be surprisingly subtle in presentation; some patients may exhibit fever without typical signs of infection on examination or standard abdominal imaging. A case study highlighted a patient whose initial symptom was new-onset atrial fibrillation, ultimately revealing a leak only detectable through a CT scan.
Alongside leaks, collections – such as intra-abdominal abscesses – are significant causes of post-operative fever. These localized pockets of infection can develop due to bacterial contamination during surgery or subsequent leakage. Prompt diagnosis is crucial, as both leaks and collections can lead to sepsis if left untreated. Vigilance and a low threshold for advanced imaging are essential in evaluating unexplained post-operative fever.
Inflammatory Response to Surgery
Surgery inherently triggers a systemic inflammatory response, a natural part of the healing process. This response involves the release of various inflammatory mediators, which can elevate body temperature, even in the absence of infection. It’s common to observe isolated fever spikes – temperatures around 38°C – in the immediate post-operative period due to this physiological reaction.
The extent of the inflammatory response correlates with the invasiveness of the surgery and the degree of tissue damage. Foreign materials introduced during the procedure, such as sutures or implants, further contribute to this inflammation. Understanding this physiological basis is crucial to avoid unnecessary antibiotic use or overly aggressive investigations for every post-operative temperature elevation. Careful clinical assessment, differentiating between a benign inflammatory response and true infection, is paramount.
Post-Vaccination Fever

Fever is a common and expected side effect following vaccination, indicating the body is building immunity. This occurs as the immune system responds to the weakened or inactive components of the vaccine, triggering an inflammatory cascade. The resulting temperature elevation is typically mild and short-lived, resolving within 24-48 hours.
It’s important to remember that a fever with no other symptoms following vaccination is often a sign of a robust immune response, not illness. Parents should not panic in these situations, but rather monitor the child for any additional symptoms. Always consult with a pediatrician if there are concerns or if the fever is unusually high or prolonged. Understanding this expected reaction helps differentiate it from other potential causes of fever, preventing unnecessary anxiety and medical intervention.
Fever with No Other Symptoms in Children
Encountering a fever in a child without accompanying symptoms can be unsettling for parents, but it’s surprisingly common. Often, these isolated fevers are benign and self-limiting, stemming from the body’s natural immune response. It’s crucial to avoid immediate panic, as the temperature reading alone doesn’t fully reflect the child’s overall health status.
Various viruses can cause differing fever intensities; a higher temperature doesn’t necessarily equate to a more severe illness. Post-vaccination or minor procedural anesthesia can also trigger such fevers. However, always consult a pediatrician to rule out underlying causes and receive personalized guidance. Remember, focusing solely on the number can be misleading; observing the child’s behavior and overall well-being is equally important when assessing the situation.
Physiological Temperature Spikes
Physiological temperature spikes represent the body’s normal response to certain stimuli, rather than indicating an infection or illness. These fluctuations are often linked to inflammatory processes triggered by the introduction of foreign materials into the body, such as during surgical procedures or even minor injuries. The body initiates an inflammatory response as a natural defense mechanism, and this can manifest as a temporary elevation in temperature.
Similarly, tissue damage and subsequent inflammation, even from relatively minor trauma, can also induce a physiological fever. It’s important to recognize that these spikes aren’t necessarily harmful and often resolve on their own as the body heals. Understanding this distinction is crucial for appropriate assessment and avoiding unnecessary medical intervention. These responses are a normal part of the body’s healing process.
Inflammatory Responses to Foreign Material
The introduction of foreign material into the body frequently elicits an inflammatory response, a cornerstone of the immune system’s defense mechanisms. This response isn’t always indicative of infection; it’s often a normal physiological reaction to the presence of something “non-self.” Surgical procedures, involving sutures, implants, or even the trauma of the incision itself, are prime examples.
This inflammatory cascade releases cytokines, signaling molecules that contribute to increased body temperature. A solitary fever of 38°C (100.4°F) post-surgery can often be attributed to this physiological process, rather than a developing infection. Recognizing this distinction is vital to avoid over-treatment with antibiotics. The body is simply working to heal and repair damaged tissues, and a mild temperature elevation is a part of that process. Careful monitoring remains essential, however, to rule out other causes.
Tissue Damage & Inflammation
Following any injury, surgical intervention, or even strenuous physical activity, tissue damage inevitably occurs. This damage triggers an inflammatory response, a complex biological process designed to initiate healing. As part of this response, inflammatory mediators – such as cytokines – are released into the bloodstream, influencing the hypothalamus, the brain’s temperature regulation center.
This hypothalamic response leads to an increase in body temperature, manifesting as a fever. Similar to inflammatory responses to foreign materials, this fever isn’t necessarily a sign of infection. It’s a natural consequence of the body’s attempt to repair damaged tissues and restore homeostasis. However, distinguishing between a physiological fever due to tissue damage and a fever caused by an infectious process requires careful clinical assessment. Monitoring for accompanying symptoms is crucial to determine the underlying cause and guide appropriate management.

Diurnal Temperature Variation
Body temperature isn’t constant throughout the day; it naturally fluctuates, exhibiting a diurnal variation. This means temperatures are typically lower in the morning and gradually rise throughout the day, peaking in the late afternoon or early evening. Consequently, fevers often become more noticeable, or even spike, during the nighttime hours. This isn’t necessarily indicative of worsening illness, but rather a reflection of this normal physiological rhythm.
The underlying mechanism involves the cyclical release of cortisol, a hormone with anti-inflammatory properties. Cortisol levels are highest in the morning, helping to suppress the immune response and lower body temperature. As cortisol levels decline in the evening, the immune system becomes more active, increasing the likelihood of detecting and responding to even minor inflammatory stimuli, potentially leading to a fever spike. Understanding this pattern can help differentiate between a concerning fever and a normal diurnal variation.
Why Fevers Spike at Night
The tendency for fevers to escalate at night is a common observation, rooted in the body’s natural hormonal cycles and immune function. Specifically, the decline in cortisol levels plays a significant role. Cortisol, a potent anti-inflammatory hormone, is typically at its highest concentration in the morning, actively suppressing the immune system. As daylight fades and cortisol production decreases, the immune system experiences a relative disinhibition.
This allows white blood cells to become more sensitive and readily detect infections or inflammatory processes. Consequently, even minor stimuli that might be dampened during the day can trigger a more robust immune response at night, manifesting as a fever spike. Essentially, the body’s defenses are on “high alert” with less hormonal suppression, leading to a more pronounced inflammatory reaction and elevated temperature. This doesn’t necessarily mean the illness is worsening, but reflects the body’s natural rhythm.
Cortisol Levels and Immune Response
Cortisol, often termed the “stress hormone,” exerts a powerful influence on the immune system, acting as a natural immunosuppressant. Its levels fluctuate throughout the day, following a circadian rhythm – peaking in the morning to promote wakefulness and declining throughout the evening, preparing the body for rest. This diurnal variation directly impacts immune cell activity and inflammatory responses.
When cortisol levels are high, they suppress the function of white blood cells, reducing inflammation and hindering the immune system’s ability to mount a full-scale defense. Conversely, as cortisol diminishes, particularly at night, immune cells become more active and sensitive to inflammatory signals. This heightened sensitivity explains why fevers often spike during nighttime hours, as the immune system is less restrained and more readily detects and responds to infection or inflammation. Understanding this interplay is crucial for interpreting fever patterns.
When to Seek Medical Attention
While isolated temperature spikes can be benign, certain accompanying symptoms necessitate prompt medical evaluation. Be vigilant for signs beyond just the fever itself, such as significant pain, difficulty breathing, severe headache, stiff neck, rash, confusion, or any indication of dehydration. The duration of the spike is also critical; a persistent fever lasting several days warrants investigation.
Crucially, avoid attempting to rapidly cool a fever with cold baths, ice packs, or alcohol rubs. These methods can induce shivering, paradoxically raising the core body temperature and causing discomfort. Alcohol rubs, in particular, pose risks due to potential skin absorption and toxicity. Instead, focus on supportive care – hydration and rest – and consult a healthcare professional to determine the underlying cause and appropriate treatment plan.
Accompanying Symptoms to Watch For
Beyond simply noting the elevated temperature, carefully observe for other symptoms that may indicate a more serious underlying condition. These include, but aren’t limited to, any signs of respiratory distress – such as difficulty breathing or rapid breathing – and neurological changes like confusion, severe headache, or stiff neck.
Pay close attention to gastrointestinal symptoms, including persistent vomiting, diarrhea, or abdominal pain, especially following surgery. Skin changes, like a new rash, are also important to report. Any signs of dehydration – decreased urination, dry mouth, dizziness – should prompt immediate medical attention. A rapid heart rate, especially if new or unexplained, also warrants evaluation. Remember, the combination of symptoms provides a more complete clinical picture than the fever alone.
Duration of the Spike

The length of time a temperature remains elevated is a critical factor in determining the appropriate course of action. A brief, isolated temperature spike that resolves within 24-48 hours, particularly in the post-operative period or following vaccination, may be less concerning than a fever that persists for several days.
Prolonged fevers – those lasting longer than three days – require medical investigation to identify the underlying cause. Recurrent fever spikes, even if they return to normal between episodes, also warrant evaluation. It’s important to track the frequency and duration of each spike, as this information will be valuable to healthcare professionals. Don’t attempt self-treatment for extended fevers; prompt medical attention is crucial to prevent potential complications and ensure accurate diagnosis.
Avoiding Cold Baths & Ice Packs
While the instinct to rapidly cool a feverish individual is understandable, cold baths and ice packs are generally discouraged. These methods can induce shivering, a natural physiological response to cold that paradoxically increases core body temperature. This can lead to a rebound temperature spike, potentially making the situation worse and causing significant discomfort.
Instead of drastic cooling measures, focus on gentle temperature regulation. Lukewarm sponge baths, light clothing, and ensuring adequate hydration are far more effective and safer approaches. These methods allow the body’s natural cooling mechanisms to work without triggering counterproductive shivering. Remember, the goal isn’t to eliminate the fever entirely, but to keep the individual comfortable while the body fights off the underlying cause.
Risks of Alcohol Rubs
Historically, alcohol rubs were used to reduce fever, but this practice is now strongly discouraged due to significant safety concerns. Alcohol is readily absorbed through the skin, potentially leading to alcohol poisoning, especially in children. This is a serious and potentially life-threatening complication.
Furthermore, alcohol evaporates quickly, creating a cooling sensation that can, like cold baths, induce shivering. This shivering response generates heat, counteracting the intended cooling effect and potentially causing a rebound temperature spike. Alcohol can also irritate the skin and, in some cases, cause respiratory depression.
Safer and more effective methods for fever management, such as lukewarm sponge baths and appropriate hydration, should always be prioritized over alcohol rubs. The risks associated with alcohol use far outweigh any perceived benefits in fever reduction.

Diagnostic Approaches
When evaluating an isolated temperature spike, a systematic approach is crucial. Initial assessment often includes a thorough history and physical examination, focusing on potential sources of infection or inflammation. A “septic screen” – encompassing blood cultures, complete blood count (CBC) with differential, and inflammatory markers like C-reactive protein (CRP) and procalcitonin – helps assess for systemic infection.
However, normal inflammatory markers don’t exclude serious pathology. In post-operative patients, particularly those with bowel surgery, a high index of suspicion for complications like anastomotic leaks or collections is vital.
Imaging, specifically a CT scan of the abdomen and pelvis, may be necessary when clinical suspicion is high, even with unremarkable initial labs or physical exam findings. As one case highlighted, a leak could be present without typical signs of infection, emphasizing the importance of judicious imaging when the clinical picture is unclear.
Septic Screen Considerations
The septic screen serves as a foundational diagnostic tool, but interpreting its results requires nuance. Blood cultures aim to identify any circulating pathogens, though negative results don’t definitively rule out infection, especially early in the course or with prior antibiotic use. A complete blood count (CBC) can reveal leukocytosis (elevated white blood cell count) or leukopenia (low white blood cell count), both potentially indicative of infection, but these findings aren’t specific.
Inflammatory markers like C-reactive protein (CRP) and procalcitonin offer additional insights. Elevated levels suggest inflammation, but can also be raised in non-infectious conditions. Procalcitonin is often considered more specific for bacterial infections, but its utility is limited in certain scenarios.

It’s crucial to remember that a normal septic screen doesn’t exclude serious pathology, particularly in immunocompromised individuals or those with subtle infections. Clinical judgment remains paramount when deciding on further investigation.
Imaging (CT Scan) – When is it Necessary?

CT scans are invaluable, but not always the first line of investigation. Post-operative patients with unexplained temperature spikes warrant consideration, particularly following major bowel surgery, to rule out anastomotic leaks or intra-abdominal collections. The Reddit discussion highlights a case where a CT scan revealed a leak despite a benign initial exam and absence of typical infectious signs.
However, indiscriminate CT scanning exposes patients to radiation and potential contrast-induced nephropathy. A CT scan is most appropriate when the clinical picture suggests a serious intra-abdominal process, such as worsening abdominal pain, signs of peritonitis, or hemodynamic instability.
If the patient is stable and improving, observation and serial examinations may be sufficient, alongside a septic screen. A low threshold for imaging is justified in high-risk patients, but clinical correlation is essential.

Fever Management Strategies (General)

Managing a temperature spike focuses on comfort and identifying the underlying cause, not aggressively reducing the fever itself. Reem Hospital emphasizes avoiding counterproductive measures like ice-cold baths, ice packs, and alcohol rubs, as these can induce shivering and paradoxically elevate the temperature.
Supportive care is paramount: ensuring adequate hydration, rest, and appropriate clothing. Antipyretics (fever-reducing medications) can be used for symptomatic relief, but should not be relied upon to mask a potentially serious infection.
Close monitoring is crucial. Track the fever’s pattern, associated symptoms, and the patient’s overall condition. Remember that the height of the fever doesn’t always correlate with the severity of the illness, as different viruses elicit varying responses.