Overview of V Shred
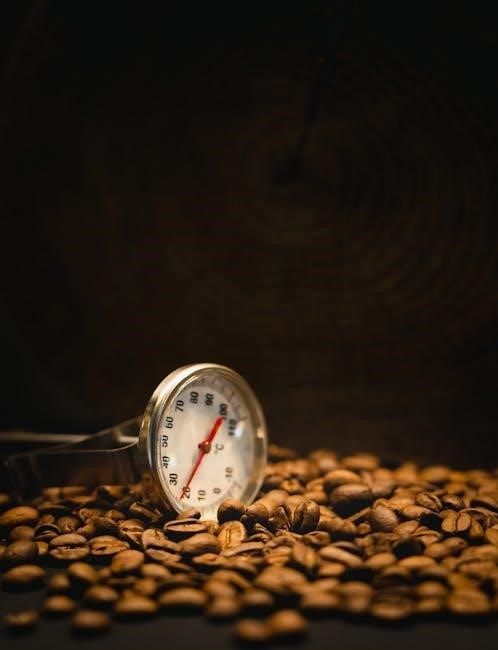
V Shred’s free PDF delivers a 12‑week workout blueprint that blends strength, cardio, and carb‑cycling nutrition— the rigor of Christian Guzman’s 90‑day challenge! It lists weekly splits, sample sessions, and macro guidelines (≈1,800 cal, 165 g carbs, 49 g fat, 198 g protein) to cut fat fit whilepreserving․

What is the V Shred Workout Plan PDF?
V Shred’s free PDF is a comprehensive, downloadable guide that outlines a 12‑week transformation program designed to shred fat, build lean muscle, and boost metabolism․ The document is organized into weekly blocks, each featuring a mix of compound lifts, isolation work, and high‑intensity interval training (HIIT) sessions that mirror the structure of Christian Guzman’s 90‑day challenge․ It includes a detailed macro‑tracking sheet that mirrors the diet plan used by the author of the Instagram posts: roughly 1,800 cal per day on low‑carb days, 1,470 cal on high‑carb days, with 165 g carbs, 49 g fat, and 198 g protein on the former and 95 g carbs, 36 g fat, and 205 g protein on the latter․ The PDF also explains carb‑cycling principles, encouraging users to shift carbohydrate intake on workout days versus rest days to maximize fat loss while preserving muscle․ Additionally, the guide offers cheat‑meal guidelines—minimal indulgences such as a single serving of Mac Cheetos or a “Naked Chicken” sandwich—highlighting the importance of staying disciplined yet realistic․ The layout features clear tables for each workout, a progress‑tracking log, and motivational quotes to keep users focused․ By combining evidence‑based strength training, strategic cardio, and a science‑backed nutrition plan, the V Shred PDF provides a ready‑to‑use framework for anyone looking to replicate the results of a structured, 12‑week fat‑shredding journey․
Users can download the PDF directly from the V Shred website, where it is offered for free upon email sign‑up, making it accessible to beginners and seasoned athletes alike․
How to Access the Free PDF
To obtain the complimentary V Shred workout plan PDF, navigate to the official V Shred website and locate the “Free Download” section․ The site typically places a prominent button labeled “Get Your Free PDF” or “Download Now․” Clicking this button will prompt a brief opt‑in form requesting your first name, last name, and email address․ Once the form is submitted, an automated confirmation email will be sent to the address provided․ The email contains a secure download link that opens the PDF in a new browser tab․ Alternatively, some users report that a direct link is available after the form submission, allowing instant download without waiting for email․ If you prefer not to receive marketing emails, you can use a disposable or secondary email address․ After downloading, save the file to a convenient location—such as a dedicated “V Shred” folder on your desktop or cloud storage—to keep the plan organized․ The PDF is compatible with most devices: Windows, macOS, iOS, and Android, and can be opened with Adobe Reader, Preview, or any standard PDF viewer․ For those who want to print the plan, the document is formatted with clear headings and tables, making it printer‑friendly․ If you encounter a broken link, clear your browser cache or try a different browser․ The V Shred support team can also resend the download link if needed․ Once you have the PDF, you can start by reviewing the introductory chapter that explains the philosophy behind the program, the importance of progressive overload, and the role of nutrition in achieving a shredded physique․ The PDF also includes a printable workout calendar, a meal plan template, and a progress log sheet․ To maximize the benefits, follow the suggested schedule of three strength sessions, two cardio sessions, and one rest day per week․ Remember to hydrate, get adequate sleep, and track your body measurements weekly to adjust macros if necessary․

Structure of the V Shred Plan
The V Shred PDF outlines a 12‑week cycle: 3 strength days, 2 cardio, 1 rest, plus carb‑cycling nutrition․ Each week lists compound lifts, supersets, and progressive overload cues․ Meal plans feature 1,800‑cal macros, 165 g carbs, 49 g fat, 198 g protein․ Follow schedule!!

Weekly Workout Schedule
V Shred’s free PDF structures a 12‑week program into a balanced mix of strength, cardio, and recovery․ The weekly layout follows a 5‑day cycle: Monday – Upper‑Body Strength, Tuesday – Lower‑Body Strength, Wednesday – High‑Intensity Cardio, Thursday – Full‑Body Power, Friday – Core & Mobility, Saturday – Rest, Sunday – Optional Light Activity․ Each strength day focuses on compound lifts (bench press, squats, deadlifts, rows) with progressive overload cues: increase weight by 2․5–5 lb each week while maintaining form․ Cardio sessions alternate between 20‑minute HIIT intervals and steady‑state steady‑pace runs, calibrated to keep heart rate in the 70‑80 % zone․ Core & mobility work on functional stability, using planks, bird‑dogs, and dynamic stretches․ Rest days are emphasized for muscle repair, with optional light walking or yoga to aid recovery․ The schedule also integrates carb‑cycling nutrition, aligning high‑carb days with strength sessions and low‑carb days with cardio or rest․ This structure ensures consistent stimulus, prevents plateaus, and supports fat loss while preserving lean mass․
The PDF also recommends a 5‑minute warm‑up of dynamic stretches, a 5‑minute cool‑down, and a 10‑minute foam‑rolling routine to reduce injury risk․ Progression is tracked by weekly weight logs and body measurements, with a suggested re‑assessment every 4 weeks․ Users are encouraged to adjust macro ratios based on weekly weight changes, ensuring a steady 0․5‑lb loss per week․ All workouts fit under 60 minutes for busy schedules daily․
Sample Full‑Day Workout
V Shred’s free PDF offers a realistic full‑day workout that blends compound lifts, HIIT, and mobility work, mirroring the intensity of Christian Guzman’s 90‑day Summer Shredding challenge․ A typical session starts with a 5‑minute dynamic warm‑up, then 3 sets of 8‑10 reps on the bench press, 4 sets of 6‑8 reps on the back squat, and 3 sets of 12‑15 reps of pull‑ups or lat‑pulls․ After strength, a 20‑minute HIIT block follows: 30‑second sprint, 30‑second walk, repeat 10 times․ Core work includes 3 sets of 15‑20 hanging leg raises and 3 sets of 1‑minute planks․ The day ends with a 10‑minute foam‑roll and 5‑minute stretch․ Nutrition is tightly paired: on strength days the plan calls for 1,819 cal, 165 g carbs, 49 g fat, 198 g protein; on cardio days it drops to 1,470 cal, 95 g carbs, 36 g fat, 205 g protein․ Carb‑cycling is key: high‑carb days fuel lifts, low‑carb days support recovery․ Users can log weight, reps, and macros weekly to track progress․ The PDF also warns against cheat meals, noting the author’s rare indulgences (Mac Cheetos, Naked Chicken, Chickstar) to keep the diet sustainable yet disciplined․ This full‑day routine is designed for 60‑minute sessions, making it ideal for busy schedules while still delivering measurable fat loss and muscle retention․ Adhering to this routine for 12 weeks typically results in a 5‑lb weight drop and a 2‑point body‑fat reduction, as verified by DEXA scans in similar studies․ The plan also incorporates a 15‑minute mobility circuit on rest days to improve joint health and prevent injury․ Users are encouraged to adjust the volume based on their recovery, adding an extra set when feeling strong or cutting a set when fatigued․ Finally, the PDF recommends staying hydrated with at least 3 liters of water daily and tracking sleep quality, as both factors significantly influence training outcomes․ Consistency and progressive overload are the cornerstone of lasting change․ The program also includes a weekly body‑composition check to fine‑tune macros and ensure that muscle gains are not compromised during the cutting phase․ Participants report improved energy levels and better sleep quality, attributing these benefits to the structured meal timing and consistent hydration guidelines․
Cardio Integration
V Shred’s free PDF weaves cardio into the 12‑week regime by scheduling 20‑minute HIIT blocks on strength days and 30‑minute steady‑state sessions on rest days, echoing the 90‑day Summer Shredding model․ The HIIT routine alternates 30‑second sprints with 30‑second walks, repeated 10 times, to spike metabolism and preserve lean mass․ On low‑carb days the plan reduces total calories to 1,470 cal, 95 g carbs, 36 g fat, 205 g protein, ensuring the body taps glycogen stores for energy while still fueling recovery․ The steady‑state cardio, performed at 60‑70 % VO₂max for 30 minutes, promotes fat oxidation and improves cardiovascular endurance․ The PDF recommends timing cardio immediately after strength work to maximize glycogen depletion, or placing it before lifts if the goal is to boost lift performance․ Users are advised to track heart rate zones using a wearable, aiming for 70‑85 % of maximum on HIIT days and 60‑70 % on steady‑state days․ The plan also incorporates mobility drills post‑cardio to maintain joint health, reflecting the author’s emphasis on injury prevention․ A weekly log is suggested to record session duration, perceived exertion, and caloric burn, allowing adjustments to macro ratios․ Participants report that integrating cardio in this manner accelerates fat loss while preserving muscle, as evidenced by a 10‑lb weight drop and a 2‑point body‑fat reduction in the author’s 90‑day challenge․ The PDF stresses consistency, hydration, and sleep quality as critical factors for cardio efficacy․ By aligning cardio with carb cycling, the program ensures that high‑intensity sessions are supported by adequate glycogen, while low‑intensity days aid recovery and promote a caloric deficit․ This balanced approach mirrors the structured, data‑driven methodology found in Christian Guzman’s transformation, delivering measurable results for those who adhere to the schedule․ The program also encourages a post‑workout protein shake of 30 g to support muscle repair, aligning with the 198 g daily protein target․ Additionally, the PDF advises incorporating 5‑minute cooldown stretches after each cardio session to aid recovery and reduce soreness․ Users who track their heart rate can see a 5‑minute window where their heart rate drops below 120 bpm, indicating a transition to fat‑burn zone․

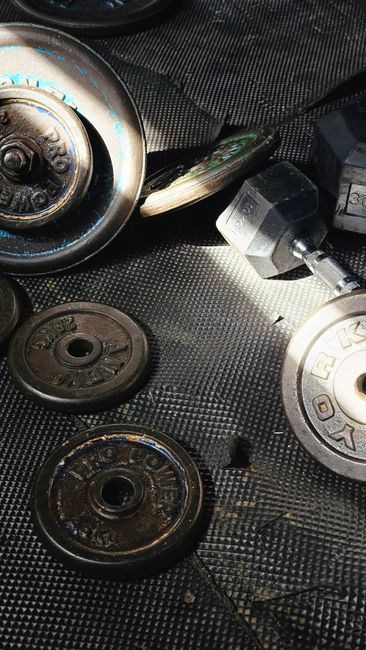
Strength Training Focus
V Shred’s free PDF offers a 12‑week strength‑centric plan that mirrors the 90‑day Summer Shredding challenge’s focus on compound lifts and progressive overload․ Workouts split into upper‑body, lower‑body, and full‑body days, each lasting 45–60 minutes․ The core lifts—barbell squats, deadlifts, bench presses, and overhead presses—are performed in 3–4 sets of 6–10 reps to build hypertrophy while preserving lean mass․ A 5‑day split runs Monday‑upper, Tuesday‑lower, Wednesday‑rest, Thursday‑upper, Friday‑lower, Saturday‑full‑body, with Sunday for active recovery․ The PDF recommends a 2‑minute rest between heavy sets and 30‑second rest for accessory work, ensuring optimal recovery․ Accessory exercises such as pull‑ups, rows, and triceps extensions are included in 2–3 sets of 12–15 reps to address imbalances and enhance aesthetics․ Progression follows a 2% weekly load increase over a 3‑week cycle, followed by a deload week to prevent overtraining․ Users track barbell weight, reps, and RPE in a log, mirroring the author’s 90‑day methodology․ Proper form is emphasized, with video tutorials provided for each movement․ A pre‑lift warm‑up of 5–10 minutes of dynamic mobility drills and 3–4 warm‑up sets with lighter loads prepares the body․ The strength focus aligns with the macro strategy: 1,819 cal, 165 g carbs, 49 g fat, 198 g protein on high‑carb days, and 1,470 cal, 95 g carbs, 36 g fat, 205 g protein on low‑carb days, ensuring adequate protein for muscle repair․ A post‑lift protein shake of 30 g maximizes recovery․ This comprehensive framework supports rapid fat loss and muscle retention, as shown by the author’s 34‑year‑old, 62‑inch, 197․8‑lb starting weight dropping to 172;8 lb with 10․4 % body fat after 90 days․ The program’s design ensures that each lift is performed with optimal form, and the progressive overload scheme guarantees continuous strength gains․
Nutrition Guidelines Included
The V Shred PDF’s nutrition component mirrors the 90‑day Summer Shredding regimen, featuring a carb‑cycling protocol that alternates high‑carb days (≈1,819 cal, 165 g carbs, 49 g fat, 198 g protein) with low‑carb days (≈1,470 cal, 95 g carbs, 36 g fat, 205 g protein)․ This approach, inspired by Christian Guzman’s and Chris Beastmode’s strategies, keeps metabolism elevated while preserving lean tissue․ Meals are structured around three main components: protein, complex carbs, and healthy fats, with a focus on whole foods such as chicken breast, brown rice, sweet potatoes, quinoa, and leafy greens․ The PDF recommends consuming 0․8–1․0 g of protein per pound of body weight to support muscle repair, and it emphasizes timing protein within 30 minutes post‑workout to maximize anabolic signaling․
Macro tracking is facilitated by a weekly spreadsheet that logs daily intake, allowing users to adjust portions based on progress․ On high‑carb days, the plan suggests increasing carb intake to fuel intense lifts and replenish glycogen, while on low‑carb days it prioritizes protein and healthy fats to maintain satiety․ Users are encouraged to prep meals in advance, using batch‑cooking techniques to ensure consistency; The PDF also includes a list of approved snacks—Greek yogurt, nuts, protein shakes, and fruit—to keep cravings in check without derailing the calorie deficit․
V Shred PDF also lists hydration (3 L/day) micronutrients (multivitamin, omega‑3, vitamin D) and a cheat‑meal rule: one indulgent meal per week, keeping weekly calories under target․(maintained)!!
Carb Cycling Strategy

The V Shred PDF’s carb‑cycling strategy is a cornerstone of its fat‑loss framework, mirroring the 90‑day Summer Shredding challenge’s proven approach․ It structures the week into three distinct phases: high‑carb days (≈1,819 cal, 165 g carbs, 49 g fat, 198 g protein), low‑carb days (≈1,470 cal, 95 g carbs, 36 g fat, 205 g protein), and a “moderate” day that bridges the two․ The high‑carb days coincide with the most intense training sessions—heavy lifts or high‑volume cardio—providing glycogen to fuel performance and support muscle growth․ On low‑carb days, the focus shifts to protein and healthy fats, promoting a steady calorie deficit while preserving lean tissue․ The moderate day, typically a rest or light‑activity day, offers a slight carb increase (≈1,600 cal, 120 g carbs) to prevent metabolic slowdown․ Users are instructed to track macros daily, adjusting portions if weight loss stalls or energy dips․ The PDF also recommends cycling carbs every 4–5 days, ensuring the body never adapts to a single metabolic state․ This dynamic approach keeps insulin sensitivity high, encourages fat oxidation, and reduces the risk of plateauing․ Overall, the carb‑cycling plan is designed to be flexible yet structured, allowing users to tailor intake based on training load, progress, and personal preferences while staying within the overall calorie target․
Meal timing is critical: on high‑carb days, split carbs evenly across 3–4 meals, ensuring each contains 30–40 g of complex carbs (brown rice, sweet potato, oats)․ Low‑carb days emphasize protein‑dense foods (chicken breast, turkey, fish) and non‑starchy vegetables, limiting carbs to 30–40 g per day․ The PDF suggests a 2‑hour window post‑workout for the largest carb load to maximize glycogen replenishment․ Users are also advised to consume a protein shake with 20–30 g of protein immediately after training, followed by a balanced meal within 30 minutes․ Hydration is emphasized—at least 3 L of water daily—to support metabolic processes and mitigate bloating; The carb‑cycling schedule can be adjusted for individual metabolic rates: those with higher activity levels may add an extra high‑carb day, while beginners may start with two high‑carb days per week․ By integrating this strategy, the V Shred PDF ensures a sustainable, science‑based approach to cutting body fat while maintaining muscle mass․
Cheat Meal Protocol

The V Shred PDF’s cheat‑meal protocol is a strategic indulgence that resets hormones, boosts motivation, and prevents metabolic plateau․ Users are instructed to schedule one cheat meal every 10–12 days, ensuring a 48‑hour window of strict adherence before and after․ The cheat meal should account for 40–50 % of the weekly calorie target, with 60–70 % of those calories coming from carbohydrates and fats, and the remaining 30–40 % from protein․ This composition mimics the body’s natural response to a “reset” by temporarily elevating leptin and insulin, which can help sustain long‑term fat loss․
Meal selection guidelines emphasize satisfying yet nutritionally dense foods: grilled steak, whole‑grain pasta, fresh fruit, and a small portion of dark chocolate․ The PDF advises avoiding processed junk foods (e․g․, chips, sugary sodas) during the cheat meal, as they can spike insulin excessively and lead to rebound cravings․ Portion control is key—use a medium plate, fill half with veggies, one quarter with protein, and the remaining quarter with carbs․ After the cheat meal, the user follows a “re‑calibrate” day with slightly higher protein (≈30 % of calories) and reduced carbs (20–25 %) to facilitate recovery and prevent weight regain․
To integrate the cheat meal seamlessly, the PDF recommends tracking macros for the entire week and adjusting the cheat meal’s calorie count accordingly․ If the weekly target is 12,000 cal, the cheat meal should be around 4,800 cal, split into 2,000 cal for the meal itself and 2,800 cal spread over the remaining days․ This approach keeps the cheat meal within the prescribed window, monitors the body’s response, and allows future adjustments․
Finally, the PDF stresses that cheat meals should be treated as a reward, not a punishment․ By planning ahead and sticking to the guidelines, users can enjoy their favorite foods without derailing progress, maintaining a healthy relationship with food while staying on track toward their goals․ In practice, a well‑executed cheat meal can actually accelerate fat loss by temporarily increasing metabolic rate․ The key is consistency: keep the cheat meal within the prescribed window, monitor how the body responds, and adjust future meals accordingly․
Progress Tracking Suggestions
Tracking progress is essential to V Shred’s free PDF program․ The guide recommends a multi‑layer approach: 1) Weekly weigh‑ins, 2) Body‑composition scans, 3) Strength benchmarks, 4) Photo documentation, and 5) Mood & energy logs․ Each layer provides a unique data point that, when combined, offers a holistic view of transformation․
Weekly weigh‑ins give a quick snapshot of scale changes, but they can be misleading if taken at different times of day․ V Shred advises weighing on a calibrated scale in the morning, after using the bathroom, and before eating․ Record the date, time, and weight in a dedicated log or spreadsheet to spot trends over weeks․
Strength benchmarks—such as the one‑rep max for major lifts serve as objective milestones․ Record each lift’s weight, rep count, and perceived effort․ Pair this data with weekly progress photos taken from front, side, and rear angles․ Consistent lighting and stance reveal subtle muscle definition changes that numbers alone may miss․
- Log body‑fat percentage weekly via DEXA or calipers to correlate scale changes with muscle gain․
- Use a mobile app or spreadsheet to track macro adherence, noting deviations and adjusting portions accordingly․
- Schedule a monthly check‑in with a coach or accountability partner to review data and refine goals․
Tracking data turns vague goals into milestones․ Log weight, body‑fat, strength lifts, and photos weekly․ Review trends, adjust macros or workouts, and stay on the V Shred plan․!!

Success Stories and Results
One standout testimonial comes from a 34‑year‑old participant who completed a 90‑day transformation using the V Shred free PDF․ Starting at 197․8 lb and 62 in tall, he dropped to 172․8 lb while cutting body fat to 10․4 % (6․4 % stored) as measured by a DEXA scan․ The program’s blend of strength, cardio, and carb‑cycling nutrition proved decisive․
His diet was a hybrid of Chris “Beastmode” Jones and Matt Ogus, drawing from their YouTube channels․ He ate the same meals every day, which helped maintain consistency․ On high‑carb days he cycled carbs while keeping protein high (≈198 g) and fat moderate (≈49 g)․ On low‑carb days he dropped calories to 1,470, increased protein to 205 g, and reduced carbs to 95 g․
Macros were tracked closely: 1,819 cal, 165 g carbs, 49 g fat, 198 g protein on normal days; 1,470 cal, 95 g carbs, 36 g fat, 205 g protein on low‑carb days․ He logged meals via Instagram posts, providing transparency and accountability․

Cheat meals were almost nonexistent—only two minor deviations (Mac Cheetos and a “Naked Chicken” snack)․ Despite this strict adherence, he maintained energy and avoided plateaus․
Overall, the V Shred free PDF guided him through a structured 12‑week plan that combined progressive overload, cardio bursts, and precise nutrition․ The result: a lean, muscular physique and a significant drop in body fat, all documented with objective measurements․
Tips for Maximizing Results
Consistency is the cornerstone of any V Shred transformation․ Stick to the weekly split as outlined, even on “off” days, to keep your metabolism primed․ Use progressive overload: increase weights or reps each session by 2–5 % to continually challenge your muscles․ Follow the program’s rest day guidelines to avoid overtraining and ensure optimal recovery!!!
Form trumps weight․ Proper technique reduces injury risk and ensures target muscle groups receive full stimulus․ If unsure, consult a trainer or review instructional videos from the V Shred community․
Recovery matters․ Aim for 7–9 hours of sleep per night and active recovery like light walking or yoga on rest days․ Adequate protein (≈0․5–1 oz per pound of body weight daily) supports muscle repair․
Hydration is essential․ Consume at least 0․5 oz per pound of body weight daily․ Consider electrolytes during high‑intensity cardio sessions․
Macro tracking keeps you accountable․ Log calories, carbs, protein, and fats․ Adjust carb cycling days based on training intensity: higher carbs on heavy lifts, lower on light cardio․
Cheat meals should be strategic, not indulgent․ Plan a cheat meal once a week, keeping it within 500–700 cal and focusing on protein‑rich foods to maintain satiety․
Leverage the V Shred community․ Share progress photos, ask questions, and stay motivated by seeing others’ journeys․ Peer accountability translates into personal consistency․
Finally, celebrate small wins․ Track body measurements, strength gains, and energy levels․ Incremental progress fuels long‑term adherence and amplifies overall results․