duoglider double stroller manual

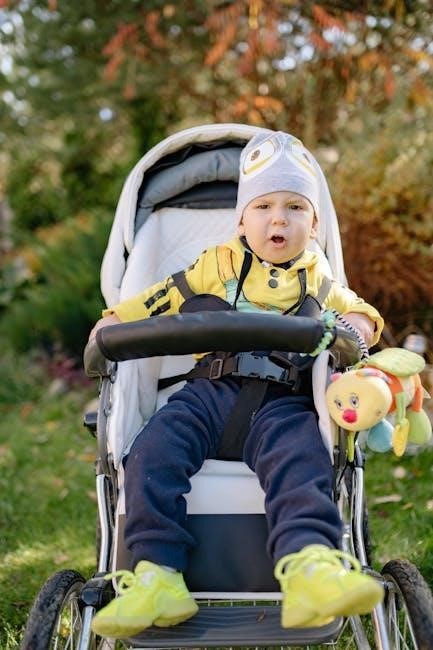
The Graco DuoGlider is a lightweight double stroller designed for comfortable tandem seating‚ offering essential features for growing families and convenient travel solutions.

This stroller boasts a large storage capacity‚ including dual cup holders‚ and prioritizes easy cleaning with mild soap and water for both frame and fabric.

Designed for children up to 40lbs per seat‚ the DuoGlider ensures secure journeys with its Click Connect system and straightforward folding mechanism.

Overview of the DuoGlider

The Graco DuoGlider Double Stroller presents a practical solution for parents navigating the demands of two young children. This tandem stroller is specifically engineered for ease of use‚ featuring a lightweight design that doesn’t compromise on durability or comfort.

It’s a popular choice due to its compatibility with Graco Click Connect infant car seats‚ allowing for seamless transitions from vehicle to sidewalk. The stroller’s configuration supports comfortable seating for both children‚ and includes convenient features like built-in cup holders for parents and little ones alike.

Maintaining the DuoGlider is straightforward‚ requiring only mild soap and water for cleaning‚ ensuring longevity and a pristine appearance.

Key Features and Benefits

The Graco DuoGlider Double Stroller excels with its lightweight frame‚ facilitating effortless maneuverability for parents on the go. A standout benefit is the tandem seating arrangement‚ accommodating two children comfortably. The Click Connect system provides seamless integration with compatible Graco infant car seats‚ simplifying travel logistics.

Practicality is enhanced by dual cup holders‚ offering convenient storage for beverages. Maintenance is simplified through easy cleaning – a moist cloth and mild soap suffice for fabric‚ while cool water cleans hard surfaces. Each seat safely supports a child up to 40lbs;

Understanding the Stroller Components

The DuoGlider features a robust frame‚ adjustable seats for varied comfort‚ and a secure harness system. These components work together to provide a safe and adaptable ride.

Frame and Chassis

The Graco DuoGlider’s frame is constructed for lightweight maneuverability‚ facilitating easy navigation through various terrains. It’s designed to support the weight of two children‚ each up to 40lbs‚ while maintaining stability.

Cleaning the frame is straightforward – simply use household soap and warm water‚ avoiding harsh chemicals like bleach to preserve its integrity. The chassis provides a solid foundation for the stroller’s functionality‚ ensuring durability for long-term use.

Regular inspection of the frame is recommended to identify any potential wear and tear‚ contributing to continued safe operation.

Seat Configuration and Adjustability

The DuoGlider features tandem seating‚ accommodating two children comfortably. Each seat is independently adjustable‚ allowing for varied configurations to suit individual needs. Seat backs can be reclined for napping or upright for engaged viewing.

This adjustability enhances passenger comfort during longer outings. The stroller’s design prioritizes flexibility‚ enabling parents to customize the seating arrangement based on their children’s ages and preferences.

Proper seat adjustment is crucial for optimal child positioning and safety‚ ensuring a secure and enjoyable ride for both passengers.

Harness System Details

The Graco DuoGlider utilizes a five-point harness system in each seat‚ designed to securely restrain children during stroller use. Proper harness adjustment is paramount for safety‚ ensuring a snug yet comfortable fit.

The harness straps should be adjusted so they are neither too tight nor too loose‚ allowing for a full range of motion without compromising security. Regularly inspect the harness buckles and straps for any signs of wear or damage.

Cleaning the harness is simple: use a moist cloth and mild soap to gently wash the surface‚ maintaining hygiene and safety.

Setting Up the DuoGlider

Initial setup involves assembling the stroller frame‚ attaching or removing compatible infant car seats via the Click Connect system‚ and adjusting seat recline positions.

Assembling the Stroller

Unboxing and initial assembly require carefully removing all components from the packaging and identifying each part. The frame typically clicks together‚ ensuring all locking mechanisms engage securely.

Begin by attaching the rear wheels until they audibly click into place‚ then proceed with the front wheels‚ verifying their smooth rotation.

Next‚ install the seat frames onto the chassis‚ confirming they lock firmly. Double-check all connections before use‚ ensuring a stable and safe foundation for your children. A properly assembled frame is crucial for stroller functionality.

Attaching and Removing Infant Car Seats (Click Connect)

The Graco Click Connect system allows for effortless integration of compatible infant car seats onto the DuoGlider stroller frame. Align the car seat base with the designated receiver points on the stroller.

Securely attach the car seat by firmly pressing down until audible clicks confirm a proper connection. To remove‚ locate the release buttons on either side of the car seat base and simultaneously press them.

Lift the car seat upwards to detach it from the stroller. Always verify a secure lock before each use and ensure the car seat is fully engaged.

Adjusting Seat Recline

The Graco DuoGlider offers adjustable seat recline for each child‚ enhancing comfort during various stages of travel. Locate the recline mechanism lever on the back of each seat. Gently squeeze the lever while simultaneously adjusting the seat back to the desired position.

Multiple recline angles are available‚ from upright for active babies to a more relaxed‚ near-flat position for napping. Ensure both recline mechanisms are locked securely after adjustment.

Always check the locking mechanism before use to guarantee stability and safety for your little ones.

Folding and Unfolding the Stroller

The DuoGlider features a simple folding process; remove infant carriers first‚ adjust seat backs to recline‚ and follow the step-by-step instructions for compact storage.

Step-by-Step Folding Instructions

To efficiently fold your Graco DuoGlider Double Stroller‚ begin by ensuring both infant car seats‚ if attached‚ are completely removed from the stroller frame. This is a crucial first step for a smooth folding process.

Next‚ adjust both seat backs to their full recline position. This provides the necessary clearance for the stroller to collapse properly. Locate the folding trigger‚ typically found on the handlebar or side of the frame.

Activate the trigger while simultaneously pushing down on the handlebar. Continue applying gentle pressure until the stroller folds inward. Secure the folded stroller with the provided strap or latch to prevent unwanted unfolding during transport or storage.

Unfolding the Stroller

Unfolding your Graco DuoGlider Double Stroller is a straightforward process. First‚ release the strap or latch securing the folded stroller‚ ensuring it’s fully unlocked. Locate the unfolding mechanism‚ often a release button or lever on the frame.

Press or activate this mechanism while gently lifting the stroller’s handlebar. The frame should automatically begin to open and lock into place with an audible click. Verify that all locking joints are securely engaged before use.

Once fully unfolded‚ double-check the stability of the stroller before placing any children inside‚ ensuring a safe and secure ride;

Folding with Car Seats Attached (if applicable)

Folding the Graco DuoGlider with infant car seats attached requires a specific sequence. Always remove the car seats first‚ as indicated in the manual‚ before initiating the folding process. This ensures a smoother‚ safer fold and prevents damage to the stroller or car seats.

Attempting to fold with car seats still connected can strain the frame and potentially compromise the locking mechanisms. Follow the standard folding instructions after car seat removal for optimal results.

Refer to the Click Connect system guidelines for proper car seat detachment.

Maintenance and Cleaning

Regular upkeep involves cleaning the frame with mild soap and water‚ avoiding bleach. Fabric seats and harnesses require gentle washing‚ while squeaky wheels benefit from light oil.

Cleaning the Stroller Frame

Maintaining the stroller’s frame is crucial for longevity and smooth operation. To effectively clean the metal and plastic components of the Graco DuoGlider‚ simply use cool water combined with a mild soap solution.

Avoid harsh chemicals or abrasive cleaners‚ as these can damage the finish or compromise the structural integrity of the frame. A soft cloth or sponge is ideal for wiping down the surfaces‚ ensuring all dirt and grime are removed.

Rinse thoroughly with clean water and allow the frame to air dry completely before folding or storing the stroller. Never submerge the frame in water.

Cleaning Fabric Seats and Harnesses

Keeping the fabric seats and harnesses clean is essential for hygiene and comfort. For routine cleaning‚ use a moist cloth and a mild soap solution to gently wash the surfaces. Avoid using strong detergents or bleach‚ as these can discolor or damage the fabric.

For deeper cleaning‚ you may be able to remove the seat pads and harnesses (refer to the full manual for removal instructions). Hand wash these components and allow them to air dry completely before reattaching.

Ensure all soap residue is removed to prevent irritation.

Wheel Maintenance (Lubrication)

Maintaining the stroller’s wheels ensures smooth and effortless maneuvering. If the wheels begin to squeak‚ it indicates a need for lubrication. Apply a light oil to the wheel axles‚ being careful not to over-lubricate‚ as this can attract dirt and debris.

Regularly check the wheels for any obstructions or damage. Ensure they rotate freely and are securely attached to the frame. Inspect the tires for wear and tear‚ and replace them if necessary.

Proper wheel maintenance extends the stroller’s lifespan.

Safety Guidelines

Always adhere to weight limits – 40lbs per seat – and properly utilize the brake system for secure stops. Ensure harnesses are adjusted snugly for child safety.

Weight Limits per Seat

Understanding and respecting the weight limits for each seat on the Graco DuoGlider Double Stroller is paramount for ensuring your children’s safety and the stroller’s optimal performance. According to the provided information‚ each seat is specifically designed to accommodate a child weighing up to a maximum of 40 pounds.

Exceeding this weight limit can compromise the stroller’s stability‚ potentially leading to tipping or malfunction of the harness system. Regularly check your child’s weight to confirm they remain within the specified range as they grow. Prioritizing adherence to these guidelines guarantees a secure and enjoyable experience for both children and caregivers.

Brake System Operation

The Graco DuoGlider Double Stroller features a reliable brake system designed to ensure secure stationary positioning‚ particularly on inclines or uneven surfaces. Proper operation is crucial for preventing unintended movement and safeguarding your children; The brake is typically engaged by a single-action mechanism‚ often a lever or pedal located near the rear wheels.

Always confirm the brake is firmly locked before unloading or loading children. Regularly inspect the brake system for any signs of wear or damage. A properly functioning brake is essential for maintaining control and ensuring a safe and stable experience during every stroll.

Harness Adjustment and Security

The Graco DuoGlider’s harness system is paramount for child safety. Ensure a snug‚ yet comfortable fit for each child‚ adjusting the straps to eliminate slack. Proper adjustment prevents escape and minimizes risk during sudden stops. Always utilize both the shoulder and waist straps‚ securing the buckle with an audible click.

Regularly inspect the harness for wear and tear‚ replacing damaged components immediately. Never add padding that could compromise the harness’s integrity. Confirm the harness is correctly positioned across the child’s shoulders and hips‚ providing optimal protection during every use.

Compatible Accessories

Enhance your DuoGlider with useful additions like cup holders‚ storage solutions‚ rain covers‚ and sun shades for added convenience and protection during outings.

Car seat adapters further expand functionality‚ allowing seamless integration with compatible Graco infant car seats for travel versatility.

Cup Holders and Storage Solutions

The Graco DuoGlider prioritizes parent convenience with thoughtfully designed storage options. Notably‚ it features two conveniently located cup holders positioned in front of each seat‚ providing easy access to beverages for both children or caregivers during strolls.

Beyond the cup holders‚ the stroller incorporates a sizable storage basket underneath the seats‚ offering ample space for diaper bags‚ toys‚ or other essential items needed throughout the day. This generous storage capacity ensures you’re well-prepared for outings‚ minimizing the need for extra trips back to the car.

These features combine to create a more enjoyable and practical experience for parents on the go.

Rain Covers and Sun Shades

While the standard Graco DuoGlider doesn’t include integrated rain covers or sun shades‚ these are available as compatible accessories to enhance your stroller’s versatility. Protecting your little ones from the elements is crucial for comfortable outings‚ and these add-ons provide essential weather protection.

A rain cover shields both seats from unexpected showers‚ keeping children dry and cozy. Similarly‚ a sun shade offers vital protection from harmful UV rays‚ ensuring a safe and pleasant experience during sunny days.

These accessories are readily available for purchase separately‚ allowing you to customize the stroller to meet your specific needs.

Car Seat Adapters

The Graco DuoGlider Double Stroller is designed with the “Click Connect” system‚ enabling seamless integration with compatible Graco infant car seats. However‚ to utilize this feature‚ dedicated car seat adapters are often required for specific car seat models.

These adapters securely attach the car seat to the stroller frame‚ creating a travel system for convenient transitions from vehicle to sidewalk. This is particularly useful for newborns or infants who require the added safety and comfort of a car seat.

Check Graco’s website for a list of compatible adapters and ensure you purchase the correct ones for your specific car seat model.

Troubleshooting Common Issues

Common problems with the DuoGlider include squeaky wheels (use light oil)‚ folding difficulties (recline seats)‚ and harness issues – ensure proper adjustment and secure locking.

Squeaky Wheels

Addressing squeaky wheels on your Graco DuoGlider Double Stroller is a simple maintenance task. Often‚ the noise indicates a need for lubrication within the wheel mechanisms. To resolve this‚ carefully inspect each wheel and axle. Apply a small amount of light oil – such as machine oil or silicone spray – directly to the wheel axles where they connect to the frame.

Rotate the wheels several times after application to ensure the oil penetrates thoroughly. Avoid using excessive oil‚ as this can attract dirt and debris. If squeaking persists after lubrication‚ double-check that the wheels are securely attached and haven’t developed any play or looseness. Regular lubrication will help maintain smooth‚ quiet operation.

Difficulty Folding

Encountering trouble folding your Graco DuoGlider? Ensure both seat backs are fully reclined before attempting to collapse the stroller. Removing any attached infant car seats is also crucial‚ as they can obstruct the folding process. Double-check that no straps or fabric are caught within the frame’s folding mechanism.

If resistance persists‚ gently manipulate the folding levers while simultaneously applying slight pressure to the stroller’s center. Avoid forcing the fold‚ as this could damage the frame. A smooth‚ controlled motion is key. Refer to the owner’s manual diagrams for visual guidance if needed.

Harness Problems

Experiencing issues with the harnesses? First‚ confirm the buckles are fully engaged‚ clicking securely into place. If a strap is difficult to adjust‚ ensure it isn’t twisted or snagged. Regularly inspect the harness webbing for any signs of wear or damage‚ replacing if necessary.

For buckles that won’t release‚ gently manipulate the release button while simultaneously lifting the buckle tongue. Never force it. Cleaning the harness with a moist cloth and mild soap can resolve sticky buckles. Always prioritize a snug‚ yet comfortable‚ fit for optimal child safety.

Graco DuoGlider Double Stroller Specifications

The DuoGlider features dimensions suited for maneuverability‚ a maximum child weight capacity of 40lbs per seat‚ and durable wheels designed for varied terrains.

Dimensions and Weight

Understanding the physical attributes of the Graco DuoGlider is crucial for storage and transport considerations. While precise dimensions aren’t explicitly detailed in readily available snippets‚ the stroller is marketed as “lightweight‚” suggesting a manageable overall weight for parents.

Its design prioritizes maneuverability‚ implying a footprint that isn’t excessively bulky. The stroller’s folded dimensions are important for vehicle compatibility‚ though specific measurements require consulting the official owner’s manual.

The weight‚ combined with its folding capability‚ contributes to its convenience for active families on the go‚ making it a practical choice for everyday use.

Maximum Child Weight Capacity

Safety and proper usage of the Graco DuoGlider depend heavily on adhering to its weight limits. Information gleaned indicates that each seat within the double stroller is designed to safely accommodate a child weighing up to 40 pounds.

Exceeding this limit compromises the stroller’s stability and the harness system’s effectiveness‚ potentially leading to safety concerns. It’s vital to regularly check your children’s weights to ensure they remain within the specified range.

Always prioritize safety by respecting the maximum weight capacity for each seating position.

Wheel Size and Type

Specific details regarding the exact wheel size of the Graco DuoGlider Double Stroller aren’t prominently featured in readily available documentation. However‚ the stroller is designed for maneuverability on various surfaces‚ suggesting appropriately sized wheels for urban and everyday use.

Regarding wheel maintenance‚ should squeaking occur‚ the manual recommends applying a light oil to the wheel axles. This simple step helps ensure smooth rolling and prolongs the stroller’s lifespan.

The wheel type appears to be standard stroller wheels‚ prioritizing durability and ease of use.

cubebot instructions

CubeBot, a captivating wooden robot designed by David Weeks, seamlessly transforms into a perfect cube, offering a unique puzzle and play experience․

These instructions guide users through assembly, posing, and care, unlocking the full potential of this innovative toy for enthusiasts of all ages․

What is a CubeBot?

CubeBot is a remarkable wooden robot, ingeniously designed to fold and unfold between a playful robotic form and a perfect cube․ Created by David Weeks, it’s more than just a toy; it’s a captivating puzzle and a delightful piece of kinetic art․

The core concept revolves around a series of precisely engineered joints and folding points, allowing for a smooth and satisfying transformation․ It’s a tactile experience, encouraging spatial reasoning and problem-solving skills․

Numerous online tutorials and instructions demonstrate how to manipulate CubeBot, showcasing its versatility․ From simple cube formation to dynamic poses, the possibilities are surprisingly extensive․ It’s a favorite among stop-motion animators and creative individuals․

History and Design of CubeBot

CubeBot originated from the creative mind of David Weeks, who sought to blend the principles of origami and mechanical engineering into a unique toy․ Initially released in 2014, it quickly gained popularity for its clever design and engaging playability․

The design emphasizes simplicity and functionality․ Constructed primarily from wood, CubeBot relies on precisely cut joints and folding mechanisms to achieve its transformative ability․ Numerous instructions and guides have been created to help users master the folding process․

Over the years, variations and customizations have emerged, but the core design remains remarkably consistent․ Online communities share tips, tutorials, and modifications, extending the life and appeal of this innovative creation․

Unboxing and Initial Inspection

Carefully open your CubeBot kit and verify all components are present․ Inspect each piece for any damage before beginning the assembly instructions․

Components Included in the CubeBot Kit

CubeBot kits typically include a set of precisely cut wooden pieces, designed to interlock and form both the robot and the cube․ Expect to find pieces designated for the head, torso, arms, and legs, each uniquely shaped for specific articulation and transformation․

The kit also contains detailed instructions, often presented as a booklet or online guide, illustrating the assembly process step-by-step․ Some versions may include small elastic bands or connectors to aid in securing certain joints, enhancing stability during posing․

It’s crucial to inventory all parts upon unboxing, ensuring nothing is missing before commencing assembly․ A complete kit will allow for a smooth and enjoyable building experience, ultimately resulting in a fully functional and poseable CubeBot․

Identifying the Different Parts

Before beginning assembly, familiarize yourself with each CubeBot component․ The head piece is usually smaller and distinctively shaped, often featuring rounded edges․ Torso pieces are larger, forming the central body, and typically have multiple connection points․

Arms and legs are generally similar in size and shape, designed for symmetrical attachment․ Pay close attention to subtle differences, as some pieces may be specifically designated for left or right sides․ Refer to the instructions to confirm proper identification․

Understanding the function of each part is key to successful construction․ Correctly identifying these elements will streamline the assembly process, preventing frustration and ensuring a well-formed CubeBot․

Step-by-Step Assembly Instructions

Follow these clear, concise steps to bring your CubeBot to life! Begin with the base formation, then attach limbs, connect the head and torso, and finalize the cube․

Step 1: Initial Folding – Forming the Base

Begin the assembly process by carefully unfolding the CubeBot’s primary structure․ Locate the pre-scored lines on the wooden pieces; these are crucial for achieving the correct cube formation․ Gently fold along these lines, ensuring crisp, clean creases for a precise base․

Pay close attention to the alignment of the panels – they must fit together snugly․ This initial folding establishes the foundation for all subsequent steps․ Refer to visual guides if available, as proper alignment here prevents issues later on․

Once folded, the base should resemble a partially constructed cube, ready for limb attachment․ Take your time and avoid forcing any pieces, as this could damage the delicate wooden joints․

Step 2: Limb Attachment – Arms and Legs

With the base established, carefully attach the arms and legs to the designated connection points․ These points are typically located on the sides of the partially formed cube․ Gently insert the limb pieces, ensuring they click or slide securely into place․

Avoid excessive force during this step, as it could strain the joints․ Check for proper articulation after each limb is attached; they should move freely without resistance․ If a limb feels stuck, gently readjust it rather than forcing it․

Ensure all four limbs are securely fastened before proceeding․ Proper limb attachment is vital for CubeBot’s stability and posability․

Step 3: Head and Torso Connection

Now, connect the head and torso sections to the assembled base and limbs․ Locate the corresponding connection points – usually a designated slot or peg system on the torso and a matching feature on the head․

Align these carefully and gently press the head onto the torso until you feel a secure connection․ Similar to limb attachment, avoid forcing the pieces together․ A snug fit is ideal, allowing for head rotation without being overly loose․

Double-check the connection to ensure stability․ This step completes the basic CubeBot form, preparing it for the final transformation․

Step 4: Final Cube Transformation – Ensuring Proper Alignment

The final step involves transforming CubeBot back into its signature cube form․ Carefully follow the folding sequence, referencing diagrams if needed․ This requires precise alignment of all limbs and the head within the torso structure․

Pay close attention to the designated folding lines and ensure each section collapses smoothly․ Misalignment can lead to difficulty completing the cube or potential stress on the joints․ Gentle pressure and patience are key․

Once folded, verify that all sides are flush and form a perfect cube․ A successful transformation indicates correct assembly and prepares CubeBot for storage or further play!

Troubleshooting Common Assembly Issues

Encountering difficulties? This section addresses common problems like limb attachment issues, misalignment during cube transformation, and handling missing or damaged parts effectively․

Difficulty with Limb Attachment

Struggling to connect the arms and legs? This is a frequently reported issue during CubeBot assembly․ Ensure you’re applying gentle, even pressure when inserting the limbs into their designated slots․ Avoid forcing the pieces, as this could cause damage to the wooden joints․

Double-check the orientation of each limb; they are subtly different and must align correctly for a secure fit․ If limbs remain loose, slightly rotating them while applying pressure can sometimes resolve the issue․ Review the assembly instructions carefully, paying close attention to the diagrams illustrating proper limb placement․

Remember, patience is key! A slow and deliberate approach will yield the best results, preventing frustration and ensuring a properly assembled CubeBot․

Misalignment During Cube Transformation

Experiencing trouble getting your CubeBot back into its perfect cube form? Misalignment is a common challenge․ Carefully inspect each joint and ensure all limbs are fully rotated and seated correctly within their slots․ A slight obstruction in one area can prevent complete transformation․

Gentle manipulation and re-adjustment of the limbs are often necessary․ Avoid excessive force, which could damage the wooden components․ Refer to the quick step-by-step instructions or video tutorials available online for visual guidance․

Ensure no small pieces or debris are lodged within the joints, hindering smooth movement․ A properly aligned CubeBot will transform effortlessly, showcasing its ingenious design․

Missing or Damaged Parts

Discovering a missing or damaged part can be frustrating! If components are absent from your CubeBot kit, or if any pieces arrive broken, immediately contact the official CubeBot website or support channels․ They typically offer replacements for defective or missing parts, ensuring a complete assembly experience․

Do not attempt to modify or substitute parts with non-original components, as this may compromise the structural integrity and functionality of the robot․ Carefully inspect all pieces upon unboxing to identify any issues early on․

Document any damage with photos and include them when contacting support for faster resolution․

CubeBot Movement and Posing

CubeBot’s articulation allows for dynamic posing and creative expression! Explore its range of motion to bring your wooden robot to life through playful arrangements․

Understanding CubeBot’s Articulation

CubeBot’s unique design hinges on carefully engineered joints, enabling a surprisingly wide range of motion despite its cubic form․ Each limb connects via these pivotal points, allowing for rotation and posing․ Understanding how these connections work is key to maximizing playability․

The shoulders, elbows, hips, and knees all feature similar articulation, permitting arms and legs to bend and extend․ Experiment with gentle movements to discover the full extent of each joint’s flexibility․ Avoid forcing any connections, as this could potentially cause wear and tear over time․

Pay attention to the direction of movement – some joints are designed for specific ranges of motion․ Mastering these nuances will unlock more complex and stable poses, enhancing your CubeBot experience․

Creating Different Poses

Once you understand CubeBot’s articulation, the possibilities for posing are endless! Start with simple stances – standing, sitting, or leaning․ Utilize the limb flexibility to create dynamic action poses, mimicking walking, running, or even dancing․

Experiment with asymmetrical poses for added visual interest․ Bend one arm while extending the other, or angle the legs in opposite directions․ Remember to maintain balance; slight adjustments to the feet and torso can significantly improve stability․

For more advanced posing, consider using CubeBot’s cube form as a base for support․ Lean it against surfaces or incorporate other objects into the scene․ Don’t be afraid to get creative and explore unconventional positions!

Advanced Techniques and Modifications

CubeBot lends itself to stop motion animation and customization! Enhance its appearance with paint or accessories, bringing your unique creative vision to life․

Stop Motion Animation with CubeBot

CubeBot’s unique articulation and transformational ability make it an ideal subject for stop motion animation projects․ Begin by securing your CubeBot and a stable camera setup․ Utilize a tripod to prevent unwanted movement during filming․

Small, incremental adjustments to CubeBot’s pose between each photograph are crucial for a smooth animation․ Software like Dragonframe or even basic video editing programs can compile these images into a captivating sequence․

Experiment with different lighting scenarios to enhance the visual appeal of your animation․ Consider creating a narrative or storyline to give your CubeBot animation purpose and engagement․ Remember to be patient, as stop motion requires meticulous attention to detail and a considerable time investment!

Customizing CubeBot with Paint or Accessories

CubeBot offers a fantastic canvas for personalization! Acrylic paints work best on the wooden surface, allowing for vibrant and durable designs․ Apply thin coats to avoid obscuring the intricate details and hindering transformation․

Consider using masking tape to create clean lines and geometric patterns․ Beyond paint, small accessories like miniature hats, scarves, or even tiny props can add character and storytelling potential․

Ensure any additions don’t impede CubeBot’s movement or ability to fold into its cube form․ Experiment with different styles – from futuristic robots to whimsical characters – and let your creativity guide you! Remember to seal painted surfaces with a varnish for added protection․

CubeBot Care and Maintenance

CubeBot benefits from gentle cleaning with a soft, dry cloth․ Proper storage prevents joint wear, ensuring smooth transformation and lasting enjoyment of this wooden robot․

Cleaning and Storage

CubeBot, crafted from wood, requires minimal cleaning to maintain its pristine condition․ Regularly dust the robot using a soft, dry cloth to remove any accumulated debris․ Avoid using abrasive cleaners or excessive moisture, as these can damage the wood finish and potentially affect the joints’ smooth operation․

For storage, choose a cool, dry location away from direct sunlight and extreme temperatures․ Consider storing CubeBot in its original packaging or a protective case to prevent scratches and dust accumulation․ Proper storage not only preserves its aesthetic appeal but also safeguards its intricate folding mechanism, ensuring it remains a delightful plaything for years to come․ Avoid placing heavy objects on top of the robot during storage․

Preventing Joint Wear and Tear

CubeBot’s intricate transformations rely on smoothly functioning joints․ To minimize wear and tear, avoid forcing any movements during assembly or posing․ Gently manipulate the limbs and body sections, ensuring they align correctly before applying pressure․ Regular, careful articulation keeps the joints flexible and prevents stiffness․

Avoid extreme poses that strain the joints beyond their intended range of motion․ If a joint feels resistant, do not force it; instead, reassess the alignment and try a different approach․ Consistent, gentle handling is key to preserving CubeBot’s longevity and ensuring its continued ability to seamlessly transition between robot and cube forms․

Resources and Further Learning

Explore the official CubeBot website for support and discover online tutorials and vibrant communities dedicated to sharing posing techniques and modifications!

Official CubeBot Website and Support

CubeBot’s official online presence serves as a central hub for all things related to this fascinating transforming robot․ The website provides direct access to frequently asked questions, addressing common assembly challenges and offering solutions for missing or damaged parts․

Users can find detailed contact information for customer support, enabling them to reach out with specific inquiries or concerns․ Beyond troubleshooting, the official site often features a gallery of user-created poses, inspiring creativity and showcasing the versatility of CubeBot․

Occasionally, exclusive content like advanced modification guides or downloadable templates for stop-motion animation are released through the website, enriching the CubeBot experience for dedicated fans․

Online Tutorials and Communities

A vibrant ecosystem of online resources exists for CubeBot enthusiasts, extending beyond the official support channels․ Platforms like YouTube host numerous video tutorials, visually demonstrating assembly steps and offering solutions to common sticking points, like limb attachment or cube transformation alignment․

Dedicated online communities and forums provide spaces for users to share their creations, exchange posing ideas, and collaborate on advanced modifications․ These platforms often feature user-submitted guides for stop-motion animation, fostering a collaborative learning environment․

Searching for “CubeBot tutorial” reveals a wealth of independent content, offering diverse perspectives and approaches to mastering this unique toy․

printable guess who character sheets pdf

Printable Guess Who Character Sheets PDF: A Comprehensive Guide

Discover a wealth of free, downloadable Guess Who? character sheets in PDF format! These resources enhance gameplay with themes, variations, and customization options.

Guess Who?, a classic Hasbro game launched in 1979, captivates players with its simple yet engaging premise: deduce your opponent’s mystery character by strategically asking yes or no questions. Originally featuring illustrated faces, the game’s enduring appeal lies in its ability to foster critical thinking and deduction skills in players of all ages. The core gameplay revolves around eliminating possibilities based on observed characteristics.

However, the game’s potential extends beyond the original character set. Printable Guess Who? character sheets offer a fantastic avenue for personalization and thematic expansion. These sheets allow players to create custom characters, introducing new challenges and sparking creativity. The availability of PDF formats ensures easy access and convenient printing for countless hours of fun.

The Popularity of Printable Character Sheets

The surge in popularity of printable Guess Who? character sheets stems from a desire for customization and expanded gameplay. While the original game is beloved, players often seek fresh challenges and thematic variety. Printable sheets provide an accessible and cost-effective solution, allowing for the creation of unique character sets tailored to specific interests – from historical figures to fictional characters.

The convenience of PDF format further fuels this trend, enabling easy downloading, printing, and even laminating for durability. Online communities and websites dedicated to sharing these resources thrive, demonstrating a strong demand for creative Guess Who? experiences beyond the standard edition.

Why Use Printable Guess Who Character Sheets?

Utilizing printable Guess Who? character sheets unlocks a realm of benefits. They offer a budget-friendly alternative to purchasing expansion packs, allowing players to continually refresh the game with new faces. Customization is key – create sheets featuring family members, favorite book characters, or even historical icons! This fosters engagement and learning.

PDF format ensures easy accessibility and printing on standard paper. Laminating the sheets extends their lifespan, protecting against wear and tear. Ultimately, printable sheets transform a classic game into a dynamic, personalized experience, enhancing replayability and creative fun.

Creating Your Own Guess Who Character Sheets

Design unique Guess Who? sheets by defining key character traits and visually appealing layouts, utilizing readily available online design tools for effortless creation.

Basic Character Traits for Sheets

Developing compelling characters for your Guess Who? sheets requires careful consideration of fundamental traits. Begin with physical appearance – hair color, eye shape, presence of facial hair, and distinctive features like glasses or hats. Next, define personality aspects: are they cheerful, serious, mischievous, or intelligent?

Occupation adds depth; consider professions like doctor, teacher, artist, or athlete. Don’t forget accessories – a hat, necklace, or specific clothing item. These details provide crucial clues during gameplay. Think about including traits that are easily visually represented, making the guessing process more intuitive and enjoyable for all players. A balance between common and unique traits ensures a challenging yet solvable game.

Designing Visually Appealing Sheets

Creating attractive Guess Who? sheets enhances the gaming experience. Utilize clear, high-resolution images for each character, ensuring they are easily distinguishable. Employ a consistent style throughout the sheet – consider a color scheme or border design.

Layout is crucial; arrange character portraits logically and leave sufficient space for questions. Font choice matters – select a readable font that complements the overall design. Incorporate subtle background patterns or textures to add visual interest without distracting from the characters themselves. A well-designed sheet is both functional and aesthetically pleasing, boosting player engagement.

Utilizing Free Online Tools for Design

Numerous free online tools simplify the creation of Guess Who? character sheets. Canva offers user-friendly templates and drag-and-drop functionality, ideal for beginners. Google Docs or Slides can also be used for basic designs, leveraging their image insertion and table creation features.

Pixlr provides more advanced photo editing capabilities for refining character images; These platforms allow customization of layouts, fonts, and colors without requiring design expertise. Remember to download your finished design as a high-quality PDF to ensure optimal printing results. Explore these resources to craft personalized and visually appealing sheets!

Finding Existing Printable Guess Who Character Sheets

Explore websites offering free PDF printables for Guess Who? Discover diverse themes and styles, readily available for download and immediate gameplay enjoyment.

Popular Websites Offering Free Printables

Numerous online platforms provide a fantastic selection of free Guess Who? character sheets in PDF format. Websites dedicated to printable games and activities frequently host a variety of options, catering to different themes and age groups. A quick internet search using keywords like “printable Guess Who sheets” or “free Guess Who characters” will reveal a plethora of choices.

Pinterest is a particularly rich source, showcasing collections curated by users. Teachers Pay Teachers, while often geared towards educational resources, also features user-created Guess Who? sheets. Additionally, dedicated crafting and DIY websites often include printable game templates. Remember to always check the terms of use before downloading and printing any materials, ensuring they are suitable for your intended purpose.

Character Sheet Variations: Themes & Styles

Printable Guess Who? character sheets aren’t limited to the classic game! A diverse range of themes and styles are readily available, enhancing the gameplay experience. Popular choices include Disney characters, superheroes, animals, and even historical figures. You can find sheets tailored to specific interests, like space, dinosaurs, or fairy tales.

Stylistically, sheets vary from simple black-and-white outlines to colorful, intricately designed images. Some creators offer sheets with unique character portraits, while others focus on specific attributes like clothing or accessories. Themed sheets often incorporate relevant backgrounds and design elements, immersing players in the chosen world. This variety allows for customized and engaging game sessions.

PDF Format Advantages for Printing

PDF (Portable Document Format) is the ideal choice for printable Guess Who? character sheets due to its numerous advantages. PDFs ensure consistent formatting across different devices and operating systems, guaranteeing the sheets will print as intended, regardless of the user’s setup. They preserve image quality, preventing pixelation or distortion during printing.

Furthermore, PDFs are easily shareable and downloadable, making them convenient for distribution. They are also relatively compact in file size, facilitating quick downloads. PDFs support high-resolution images, crucial for clear character depictions. This format also allows for easy printing on various paper types and sizes, offering flexibility for game preparation.

Character Ideas for Your Sheets

Unleash creativity with classic or original characters! Consider physical traits, personalities, occupations, accessories, and clothing for engaging gameplay.

Classic Guess Who? Characters

Revisit beloved faces from the original Guess Who? game! These iconic characters provide a familiar starting point for printable sheets. Think of Susan, with her distinctive hat, or Oliver, known for his mustache. Emily, often depicted with glasses, and George, sporting a beard, are also staples.

Expanding upon these, include Robert with his pipe, Jessica with her bow, and David, easily recognized by his glasses and hat combination. Utilizing these classic designs ensures immediate recognition and nostalgic fun. Printable sheets can faithfully recreate these characters, or offer slight variations for added challenge. Remember to focus on key identifying features when designing your sheets for optimal gameplay and enjoyment!

Creating Original Characters

Unleash your creativity by designing entirely new characters for your Guess Who? sheets! Consider diverse backgrounds, professions, and appearances. Think about a quirky librarian with bright glasses, a daring astronaut with a helmet, or a mischievous chef with a tall hat.

Focus on unique traits – a prominent birthmark, an unusual hairstyle, or a distinctive accessory. These details are crucial for effective guessing. Develop backstories to inspire character design and add depth to the game. Printable sheets allow for limitless possibilities, moving beyond the traditional set. Remember, clear visual cues are key to a fun and engaging guessing experience!

Character Traits: Physical Appearance

Detailing physical traits is vital for successful Guess Who? gameplay. Consider hair color and style – is it long, short, curly, or straight? Note eye color, and whether the character wears glasses or has any facial hair. Include details like skin tone and any noticeable features such as freckles or scars.

Think about clothing! Does the character wear a hat, a specific type of jewelry, or a uniform? These visual cues are essential for players to formulate questions. Clearly represent these features on your printable sheets, ensuring they are easily distinguishable. Remember, the more specific the details, the more engaging the game becomes!

Character Traits: Personality & Occupation

Beyond physical attributes, personality and occupation add depth to your Guess Who? characters. Consider professions – a doctor, teacher, artist, or athlete. Describe personality traits: are they cheerful, serious, adventurous, or shy? These characteristics influence how players ask questions.

Think about hobbies and interests. Does the character enjoy reading, sports, or music? These details provide further clues. Represent these traits subtly on the character sheets, perhaps through accessories or background elements. A book for a reader, or a sports ball for an athlete. Combining occupation and personality creates memorable and engaging characters!

Character Traits: Accessories & Clothing

Accessories and clothing are vital clues for Guess Who? characters. A hat, glasses, or jewelry instantly distinguish individuals. Clothing style – formal, casual, sporty – reveals personality and occupation. Consider details like scarves, ties, or even specific patterns.

Visually represent these elements clearly on your printable sheets. Use color and shading to highlight accessories. Think about how clothing relates to the character’s profession. A chef might wear a hat and apron, while a detective could sport a trench coat. These details make characters more recognizable and enhance the guessing game!

Printing and Preparing Your Sheets

Ensure high-quality prints using appropriate paper and printer settings. Laminating the sheets provides durability, protecting them from wear and tear during gameplay.

Paper Quality for Optimal Results

Selecting the right paper significantly impacts the final look and feel of your printable Guess Who? character sheets. For vibrant colors and sharp image clarity, a heavier weight paper is recommended – think around 65lb to 80lb cover stock. This prevents ink bleed-through, especially crucial if using markers for customization.

Standard printer paper (20lb) can work, but the images may appear less crisp and the paper more prone to bending or tearing with repeated use. Matte photo paper offers excellent color reproduction and a professional finish, though it can be more expensive. Consider the longevity of your sheets; thicker, higher-quality paper will withstand more handling. Ultimately, the paper choice balances cost, durability, and desired aesthetic appeal.

Printer Settings for Clear Images

Achieving optimal print quality for your Guess Who? character sheets requires adjusting your printer settings. Select the “Photo” or “Best” quality setting for sharper details and richer colors. Ensure your printer is set to print at the correct paper size – typically 8.5 x 11 inches (US Letter);

Disable any “economy” or “draft” modes, as these reduce ink usage at the expense of image clarity. Check the color settings; vibrant character sheets benefit from a higher color intensity. A DPI (dots per inch) of at least 300 is recommended for crisp images. Performing a test print before committing to a full batch is always advisable to verify settings and prevent wasted ink and paper.

Laminating Sheets for Durability

Extend the lifespan of your printable Guess Who? character sheets by laminating them! This simple process protects against wear and tear from repeated use, spills, and sticky fingers. Laminating pouches are readily available at office supply stores and online retailers.

Use a laminator to seal the sheets, creating a waterproof and durable surface. Alternatively, self-adhesive laminating sheets offer a no-heat option. Laminated sheets are easily wiped clean, ensuring continued clarity. Consider laminating both sides for maximum protection, especially if using cardstock. This investment significantly increases the longevity of your game components.

Gameplay Variations with Printable Sheets

Unlock exciting new ways to play Guess Who? with printable sheets! Introduce themed games, difficulty levels, and story-based characters for enhanced fun.

Adding Difficulty Levels

Elevate your Guess Who? experience by strategically adjusting the difficulty! Printable sheets facilitate this beautifully. For beginners, utilize sheets with fewer characters, offering simpler distinctions. Conversely, challenge seasoned players with sheets boasting a larger cast and more subtle differences in appearance.

Introduce “clue limits” – restrict the number of yes/no questions allowed per round. Alternatively, implement a “penalty” system for incorrect guesses, such as losing a turn. Consider creating character sheets with intentionally similar traits, demanding sharper observation skills.

Advanced players might enjoy a “mystery trait” rule, where one character possesses a hidden characteristic not visible on the sheet, adding an extra layer of deduction. These modifications, enabled by easily customizable printable sheets, ensure engaging gameplay for all skill levels.

Themed Guess Who? Games

Transform your Guess Who? game with captivating themes! Printable character sheets are key to unlocking endless possibilities. Imagine a “Historical Figures” edition, featuring inventors, artists, and leaders. Or perhaps a “Fairy Tale” version, populated by princesses, princes, and mythical creatures.

Consider themes like “Superheroes,” “Movie Characters,” or even “Animals.” The beauty of printable sheets lies in their adaptability. Easily create or find pre-made sheets aligned with your chosen theme, enhancing immersion and educational value.

Further enhance the experience by incorporating themed questions. Instead of “Does your character wear glasses?”, ask “Does your character possess magical powers?” These thematic variations breathe new life into the classic game.

Creating Story-Based Characters

Elevate your Guess Who? experience by crafting characters with rich backstories! Printable sheets facilitate this creative process. Instead of simple traits, develop characters with occupations, motivations, and relationships. Imagine a detective with a mysterious past or a chef with a secret ingredient.

Detail each character’s narrative on the sheet – a brief biography, a defining quirk, or a hidden ambition. This encourages more engaging questions. Instead of “Does your character have a beard?”, ask “Is your character searching for a lost treasure?”

These story-driven characters transform the game into a mini-investigation, fostering imagination and storytelling skills. Printable sheets become more than just images; they’re portals to unique worlds.

Troubleshooting Common Issues

Resolve printing problems like image resolution or sheet size. PDF compatibility and printer settings are key to clear, correctly sized Guess Who? sheets.

Image Resolution Problems

Low-resolution images on your printable Guess Who? sheets can result in blurry or pixelated character faces, hindering gameplay. This often stems from the original image source being too small or from improper scaling during PDF creation. To fix this, ensure you’re downloading sheets from reputable sources offering high-quality PDFs.

Before printing, check the image preview within your PDF viewer; zoom in to assess clarity. If the resolution is poor, try searching for alternative sheets. When creating your own, use high-resolution images initially. Also, verify your printer settings – selecting a higher DPI (dots per inch) can significantly improve print quality, though it may consume more ink. Experiment with different settings to find the optimal balance between clarity and ink usage.

Printing Errors & Solutions

Common printing issues with printable Guess Who? sheets include incomplete images, color distortions, or misaligned characters. Often, these stem from incorrect printer settings. Ensure your printer is set to the correct paper size and quality (e.g., standard, photo). Check ink levels – low ink can cause faded or streaky prints.

If images are cut off, adjust the scaling options in your print dialogue box to “fit to page” or a custom percentage. For color problems, verify your printer’s color calibration. Test prints on plain paper can help diagnose issues before wasting cardstock. Finally, ensure the PDF isn’t set to print in grayscale if color is essential for character recognition.

Sheet Size & Compatibility

Printable Guess Who? character sheets commonly come in standard paper sizes like US Letter (8.5 x 11 inches) or A4 (210 x 297 mm). Before printing, verify the sheet’s dimensions within the PDF viewer to ensure proper scaling. Most PDF readers are universally compatible across operating systems (Windows, macOS, Linux).

However, older PDF versions might require an updated reader like Adobe Acrobat Reader. Compatibility issues are rare, but if a sheet doesn’t display correctly, try opening it with a different PDF viewer. Consider the cardstock size when choosing a sheet; ensure it fits your intended cutting method for individual character cards.

Guess Brand Overview

GUESS, a global fashion brand founded in 1981, embodies a youthful, sexy, and adventurous spirit with its denim and lifestyle products.

GUESS: A Fashion and Lifestyle Brand

GUESS, originating as a denim-focused brand in 1981, has evolved into a globally recognized fashion and lifestyle powerhouse. Founded by the Marciano brothers, the brand quickly gained prominence by embracing a youthful, optimistic, and adventurous aesthetic. Initially facing challenges in a struggling American apparel market, GUESS distinguished itself with a focus on European-inspired designs and a distinctly American sensibility.

Today, GUESS offers a diverse range of products, including apparel, accessories, watches, and fragrances. The brand’s identity centers around a celebration of individuality and self-expression, appealing to a broad demographic seeking stylish and accessible fashion. It continues to represent a bold and confident lifestyle, remaining a significant player in the global fashion industry.

GUESS Watches and Accessories

GUESS extends its fashion-forward approach beyond apparel into a compelling line of watches and accessories. Introduced in 2015, GUESS watches initially showcased a bold, avant-garde, and stylish aesthetic, particularly with their first foray into sporty designs. These timepieces cater to individuals embracing current trends and seeking a statement piece.

The accessory collection encompasses handbags, belts, sunglasses, and jewelry, all reflecting the brand’s signature blend of sensuality and contemporary style. GUESS accessories often feature distinctive branding elements, like the iconic triangle logo, and are available across a range of price points, enhancing accessibility for a wider consumer base.

GUESS Brand Identity and Target Audience

GUESS cultivates a brand identity centered around youthful optimism, adventurous spirit, and a touch of sensuality. Established in 1981, the brand quickly became synonymous with a daring, American aesthetic, appealing to those who embrace self-expression and dream-chasing. GUESS consistently embodies a bold and confident lifestyle.

The primary target audience consists of young adults and millennials, aged 18-35, who are fashion-conscious and value both style and affordability; GUESS successfully attracts consumers seeking trendy, yet accessible, clothing and accessories. The brand’s marketing often features aspirational imagery and collaborations, further solidifying its appeal to this demographic.

“Guess What?” and “I Guess So” in English

“Guess What?” sparks curiosity, inviting a prediction, while “I Guess So” conveys reluctant agreement or uncertainty—useful for playful game interactions.

The Meaning and Usage of “Guess What?”

“Guess What?” is a common English phrase used to build anticipation and encourage someone to speculate about upcoming news or a revelation. It’s a conversational opener, signaling that the speaker is about to share something potentially interesting or surprising. Think of it as a playful invitation to a mini-game of deduction!

In the context of printable Guess Who? character sheets, you might use “Guess What?” to introduce a new, custom character you’ve created. For example, “Guess What? I’ve added a pirate with a parrot to the sheet!” It’s a lighthearted way to engage others and initiate the guessing process. The phrase adds an element of fun and excitement, mirroring the core gameplay of Guess Who? itself.

Essentially, it’s a versatile phrase that adds a touch of playful interaction to any conversation, and perfectly complements the spirit of the game.

Understanding “I Guess So” in Conversation

“I Guess So” expresses a hesitant agreement or a reluctant concession. It indicates a lack of strong conviction, suggesting the speaker isn’t entirely certain but acknowledges a possibility. It’s less definitive than “I think so,” implying a more passive acceptance based on limited information or intuition.

Relating this to printable Guess Who? sheets, a player might say “I guess so” when asked if a character possesses a specific trait; For instance, “Does she wear glasses?” – “I guess so.” This signifies they’re not entirely sure based on the sheet’s depiction, but concede it’s a likely possibility.

It conveys a casual, uncertain tone, often used to avoid a firm commitment or to soften a potentially incorrect assumption during gameplay. It’s a subtle nuance in communication!

LPJ-GUESS Model Discussion

The LPJ-GUESS model, focused on data analysis, isn’t directly linked to printable Guess Who? sheets; however, modeling principles apply to character trait analysis.

Brief Overview of the LPJ-GUESS Model

LPJ-GUESS is a dynamic global vegetation model used extensively in ecological and climate change research. It simulates terrestrial ecosystem processes, including plant growth, carbon cycling, and water balance. While seemingly unrelated to printable Guess Who? character sheets, the model’s core principle – representing complex systems with defined parameters – mirrors the creation of character attributes.

Just as LPJ-GUESS uses variables like temperature and precipitation, character sheets rely on traits like hair color and occupation. Both involve defining characteristics to differentiate entities within a system. The model’s analytical capabilities could, theoretically, be applied to analyze patterns in character sheet design or gameplay strategies, though this is a novel application. Essentially, both involve structured representation of diverse elements.

Relevance to Data Analysis and Modeling

Analyzing printable Guess Who? character sheets through a data lens reveals interesting patterns. The frequency of specific traits – like glasses or hats – can be quantified, creating a dataset. Modeling these distributions could predict optimal guessing strategies, minimizing the average number of questions needed to identify a character.

Furthermore, variations in sheet themes (e.g., historical figures, fictional characters) offer comparative data. Analyzing trait prevalence across themes could highlight cultural biases or design preferences. This approach, while playful, demonstrates basic data analysis principles applicable to more complex modeling scenarios. The sheets become a microcosm for exploring data representation and inference.

angles of elevation and depression worksheet with answers pdf

Angles of elevation and depression are crucial concepts explored in worksheets, often available as PDF documents with solutions․
These resources present 10-12 problems,
focusing on calculating heights and distances using trigonometric principles․

What are Angles of Elevation?

Angles of elevation represent the angle formed between a horizontal line and the line of sight when looking upwards towards an object․ Imagine standing on level ground and observing the top of a building or a soaring airplane; the angle created is the angle of elevation․ Worksheets dedicated to these angles, frequently found as PDF files with accompanying answers, often present scenarios requiring the calculation of this angle or utilizing it to determine unknown heights․

These PDF worksheets typically include problems where you’re given a distance from the base of an object and its height, and you must find the angle․ Conversely, some problems provide the angle and the height, asking you to calculate the distance․ Understanding this concept is fundamental, as many real-world applications, like surveying and navigation, rely on accurately determining angles of elevation․ Numerous online resources offer these practice materials, authored by educators like NN Nevedrova in 2024, to reinforce this vital trigonometric skill․

What are Angles of Depression?

Angles of depression are formed when observing an object below the horizontal line of sight․ Picture yourself standing on a cliff overlooking a boat at sea; the angle between your line of sight and a horizontal line is the angle of depression; PDF worksheets focusing on angles of elevation and depression commonly include problems centered around calculating these angles, often providing solutions for self-assessment․

These resources, like those authored by NN Nevedrova in 2024, present scenarios where you might be given the height of an object and the distance to it, requiring you to determine the angle of depression․ Alternatively, the angle and distance might be provided, asking you to calculate the height․ Mastering angles of depression is crucial for applications in fields like surveying and navigation, where determining distances and heights from elevated positions is essential․ Practice problems, readily available as downloadable PDFs, help solidify understanding of this key trigonometric concept․

Understanding the Basics of Trigonometry

Trigonometry is fundamental to solving angles of elevation and depression problems found in PDF worksheets;
it relates angles and sides of right triangles for accurate calculations․

SOH CAH TOA – A Key Concept

SOH CAH TOA is a mnemonic device vital for mastering trigonometric ratios, frequently applied when working through angles of elevation and depression worksheets, often found as PDF files with included answers․ This acronym represents Sine = Opposite/Hypotenuse, Cosine = Adjacent/Hypotenuse, and Tangent = Opposite/Adjacent․

These ratios establish the relationships between the angles and sides within a right triangle, enabling the calculation of unknown angles or side lengths․ Many worksheets, like those authored by NN Nevedrova in 2024, heavily rely on the tangent function due to its direct application in elevation and depression scenarios․ Understanding which side is opposite, adjacent, or the hypotenuse relative to the given angle is paramount․ Correctly identifying these sides is the first step towards successfully solving problems involving heights, distances, and angles, as demonstrated in the provided problem sets․

Relating Angles to Right Triangles

Angles of elevation and depression are inherently linked to right triangles․ Visualizing these angles within a right-angled context is crucial for applying trigonometric principles, particularly when tackling problems found in angles of elevation and depression worksheets – often available as PDF documents with solutions․

The angle of elevation, formed by looking upwards, and the angle of depression, formed by looking downwards, both have a horizontal line as a reference․ This horizontal line, combined with the line of sight to the object, creates the right triangle․ The height of the object or the distance to it then become the opposite or adjacent sides․ Worksheets, including those analyzed from 2024, consistently present scenarios requiring this right triangle decomposition․ Successfully solving these problems hinges on recognizing this geometric relationship and correctly identifying the triangle’s components․

Solving Problems with Angles of Elevation

Elevation problems, frequently found in worksheets (PDF format with answers), require identifying the opposite and adjacent sides within right triangles to apply trigonometric functions․

Identifying the Opposite and Adjacent Sides

Successfully tackling angles of elevation and depression worksheet problems, often available as PDFs with solutions, hinges on correctly identifying the opposite and adjacent sides of the right triangle formed․ The “opposite” side is always across from the angle in question – whether it’s the angle of elevation or depression․ Conversely, the “adjacent” side is next to the angle, but not the hypotenuse․

Many worksheets present scenarios involving heights of buildings, distances to boats, or angles from observers to objects․ Visualizing these scenarios and drawing a clear right triangle is paramount․ Remember, the horizontal line of sight is crucial; it forms the base for many problems․ Incorrectly labeling these sides will lead to inaccurate calculations, even if the trigonometric function is applied correctly․ Practice with various PDF examples will solidify this foundational skill, preparing you for more complex problems․

Using Tangent Function for Elevation Problems

When solving angles of elevation worksheet problems – frequently found as PDFs with detailed answers – the tangent function is your primary tool․ Recall that tangent (tan) is defined as Opposite/Adjacent․ In elevation problems, the angle of elevation, the height (opposite side), and the horizontal distance (adjacent side) form the core relationship․

Therefore, tan(angle of elevation) = height / distance․ Many worksheets present scenarios requiring you to find either the height or the distance, given the angle and the other measurement․ Carefully rearrange the formula to isolate the unknown variable․ Ensure your calculator is in degree mode for accurate results; Mastering this application, through consistent practice with PDF examples, is essential for success․ Remember to always include units in your final answer, ensuring clarity and correctness․

Example Problem 1: Finding the Height of a Building

Let’s illustrate with a typical problem found in angles of elevation and depression worksheets, often available as PDFs․ Suppose you stand 50 feet away from a building and measure an angle of elevation to the top as 60 degrees․ To find the building’s height, we utilize the tangent function․

tan(60°) = height / 50 feet․ Solving for height, we get height = 50 feet * tan(60°); Using a calculator, tan(60°) ≈ 1․732․ Therefore, height ≈ 50 feet * 1․732 ≈ 86․6 feet․ Many PDF worksheet solutions will demonstrate this step-by-step․ Always double-check your work and units․ Practice with similar problems from various worksheets will solidify your understanding of applying trigonometric ratios to real-world scenarios, ensuring accurate height calculations․

Solving Problems with Angles of Depression

Worksheets, often in PDF format, present scenarios requiring angle of depression calculations to determine distances or heights, with provided answers․

Identifying the Opposite and Adjacent Sides (Depression)

When tackling problems involving angles of depression, accurately identifying the opposite and adjacent sides within the right triangle is paramount․ Worksheets, frequently available as PDF files with solutions, often illustrate this with diagrams․ Remember, the angle of depression is formed below the horizontal line of sight․

The ‘opposite’ side is always directly across from the angle of depression․ This typically represents the height difference between the observer and the object being viewed․ Conversely, the ‘adjacent’ side is next to the angle – usually the horizontal distance between the observer and the object․ Many PDF worksheets emphasize this distinction through practice problems․

Carefully analyze each problem’s diagram․ Misidentifying these sides will lead to incorrect calculations․ The provided answer keys in these PDF resources are invaluable for verifying your understanding and identifying any errors in side identification before applying trigonometric functions․

Using Tangent Function for Depression Problems

The tangent function is your primary tool for solving problems involving angles of depression, as demonstrated in many angles of elevation and depression worksheet examples – often found as PDFs with detailed solutions․ Recall that tangent (tan) is defined as Opposite/Adjacent․ Once you’ve correctly identified these sides in your right triangle (as discussed previously), applying the tangent function becomes straightforward․

For depression problems, the angle of depression itself isn’t directly used in the tangent ratio․ Instead, utilize the alternate interior angles property – the angle of depression equals the angle of elevation from the object to the observer․ This simplifies calculations․

Numerous PDF worksheets provide step-by-step guidance, showing how to set up the equation (tan θ = Opposite/Adjacent) and solve for the unknown side․ Always double-check your units and utilize the answer key within the PDF to confirm accuracy․

Example Problem 2: Finding the Distance to a Boat

Let’s consider a typical problem found within an angles of elevation and depression worksheet, often available as a PDF with solutions․ A lighthouse observer spots a boat at an angle of depression of 20 degrees․ If the lighthouse is 100 feet high, what is the horizontal distance from the boat to the base of the lighthouse?

Here, the lighthouse height is the ‘Opposite’ side, and the distance to the boat is the ‘Adjacent’ side․ We use tan(20°) = 100 / Distance․ Solving for Distance, we get Distance = 100 / tan(20°)․

Using a calculator, tan(20°) ≈ 0․364․ Therefore, Distance ≈ 100 / 0․364 ≈ 274․7 feet․ Many PDF worksheets include similar examples, guiding you through each step․ Always verify your answer against the provided key to ensure understanding and accuracy in applying these trigonometric principles․

Worksheet Problem Types & Difficulty Levels

Angles of elevation and depression worksheets, often in PDF format, range from basic tangent applications to multi-step calculations and incorporating other trigonometric functions․

Basic Problems: Direct Application of Tangent

Basic problems within angles of elevation and depression worksheets (typically found as PDFs with answers) center around the direct application of the tangent function․ These introductory exercises usually present scenarios where students are given an angle of elevation or depression and the length of either the opposite or adjacent side of the right triangle formed․

The core task involves using the formula: tan(angle) = opposite / adjacent to calculate the unknown side․ For instance, a problem might state: “The angle of elevation to the top of a building is 30 degrees․ If you are standing 50 feet away from the base of the building, what is the height of the building?” Students directly apply the tangent function to solve for the height (opposite side)․

These initial problems aim to solidify understanding of the trigonometric ratio and its relationship to angles and sides in right triangles, providing a foundation for more complex calculations․ Worksheets often include 8-10 such problems to ensure mastery of this fundamental concept․

Intermediate Problems: Multi-Step Calculations

Intermediate problems on angles of elevation and depression worksheets (often available as PDFs with solutions) move beyond direct tangent application, requiring multiple steps to arrive at the answer․ These scenarios frequently involve combining angles of elevation/depression with other geometric concepts or requiring students to create their own right triangles within a larger diagram․

For example, a problem might present a situation where an observer on a cliff measures the angle of depression to a boat, but the height of the cliff itself needs to be calculated first using additional information․ This necessitates breaking down the problem into smaller, manageable steps․ Students might need to use the Pythagorean theorem alongside trigonometric functions․

These problems test a deeper understanding of the concepts and the ability to apply them in more complex, real-world contexts․ Worksheets typically include 5-7 of these multi-step challenges, building upon the foundation established in basic problems․

Advanced Problems: Incorporating Other Trigonometric Functions

Advanced problems found on angles of elevation and depression worksheets (often in PDF format with provided answers) extend beyond the tangent function, demanding proficiency in sine and cosine․ These challenges typically involve scenarios where the adjacent side isn’t directly given, necessitating the use of sine or cosine to determine it before applying tangent․

Problems might present situations requiring the Law of Sines or Cosines, particularly when dealing with non-right triangles formed by multiple angles of elevation or depression․ Students must strategically choose the appropriate trigonometric function based on the given information and the unknown variable․

These problems often involve more complex geometric figures and require a strong understanding of trigonometric ratios and their relationships․ Worksheets dedicated to this level usually contain 3-5 problems, designed to solidify a comprehensive grasp of the topic and prepare students for more advanced mathematical concepts․

Common Mistakes to Avoid

Worksheets often lead to errors if students incorrectly identify opposite/adjacent sides or forget unit conversions when solving angles of elevation/depression problems․

Incorrectly Identifying Opposite and Adjacent Sides

A frequent error encountered when working through angles of elevation and depression worksheets, particularly those in PDF format with provided answers, stems from misidentifying the opposite and adjacent sides within the right triangles formed by these scenarios․ Students often struggle to visualize these sides relative to the given angle․

Remember, the opposite side is always across from the angle in question, while the adjacent side is next to it․ In elevation problems, if the angle is looking up at a building, the building’s height is typically the opposite side․ Conversely, in depression problems, where you’re looking down at an object, the horizontal distance to that object is often the adjacent side․

Carefully examine the diagram accompanying each problem on the worksheet․ A clear understanding of which side is opposite and which is adjacent is fundamental to correctly applying trigonometric functions like tangent, sine, or cosine․ Incorrect identification leads to inaccurate calculations and ultimately, a wrong answer․ Always double-check your labeling before proceeding with the calculations!

Forgetting to Convert Units

A common pitfall when tackling angles of elevation and depression worksheets – especially those distributed as PDFs with answer keys – is overlooking the necessity of unit conversions․ Problems frequently present measurements in mixed units, such as feet and meters, or degrees and radians․ Failing to standardize these units before applying trigonometric functions will inevitably lead to incorrect results․

Always meticulously check the units provided in the problem statement and ensure they are consistent before using formulas like tangent (tan)․ For instance, if the height is given in meters and the distance in feet, convert one to match the other․ Remember to maintain consistency throughout the entire calculation․

Pay close attention to angle measurements as well․ Ensure your calculator is set to the correct mode (degrees or radians) corresponding to the units used in the problem․ A simple unit conversion error can invalidate an otherwise correct approach, so diligence is key when working through these problems․

Resources for Practice: Angles of Elevation and Depression Worksheets (PDF)

Numerous PDF worksheets, authored by sources like NN Nevedrova (2024), offer practice problems with solutions,
containing 8-12 questions focused on calculating angles and distances․

NN Nevedrova’s 2024 Worksheet Analysis

NN Nevedrova’s 2024 worksheet, readily available as a PDF, provides a focused assessment of angles of elevation and depression․ The document contains approximately 12 problems designed to test a student’s ability to apply trigonometric ratios – specifically tangent – to real-world scenarios․ These scenarios typically involve determining heights of buildings or distances to objects, given either the angle or relevant side lengths․

A key feature of Nevedrova’s worksheet is the inclusion of answer keys, facilitating self-assessment and independent learning․ The problems range in complexity, starting with direct applications of the tangent function and progressing to scenarios requiring multi-step calculations․ The worksheet effectively reinforces the core concepts and provides ample opportunity for students to practice problem-solving techniques related to these essential trigonometric principles․ The format is conducive to both classroom use and homework assignments, promoting a comprehensive understanding of the subject matter․

Availability of Online PDF Worksheets

Numerous online resources offer angles of elevation and depression worksheets in PDF format, often including answer keys for immediate feedback․ Platforms like Transmed and various educational websites host these materials, catering to diverse learning needs․ A quick search reveals documents containing 8 to 10 problems, designed to assess understanding of height and distance calculations using trigonometric functions․

These readily accessible worksheets vary in difficulty, ranging from basic applications of the tangent function to more complex, multi-step problems․ Many are freely downloadable, providing valuable practice opportunities for students and educators alike․ Some resources, like those found through specific search queries, offer comprehensive sets of problems covering a wide spectrum of scenarios․ The prevalence of these online PDFs underscores the importance of mastering these concepts in trigonometry and their practical applications․

Applications Beyond the Classroom

Angles of elevation and depression, practiced via PDF worksheets, are vital in surveying, navigation, engineering, and architecture for real-world height/distance calculations․

Surveying and Navigation

Surveying heavily relies on precise angle measurements, utilizing angles of elevation to determine heights of terrain features like hills and buildings, and angles of depression to map contours and distances․ Professionals frequently employ worksheets – often found as PDF documents with accompanying answers – to hone these skills and ensure accuracy in field measurements․ These practical exercises reinforce the trigonometric principles applied in real-world scenarios․

In navigation, particularly in aviation and maritime contexts, understanding angles of elevation and depression is critical․ Pilots use these angles to determine altitude and distance to landmarks, while sailors employ them for celestial navigation, calculating position based on the angle of the sun or stars above the horizon․ The availability of practice PDF worksheets allows for consistent skill development and preparedness for complex navigational challenges․ Mastering these concepts, through dedicated practice, is paramount for safe and efficient travel․

Engineering and Architecture

Engineering disciplines, such as civil and mechanical, frequently utilize angles of elevation and depression in design and construction․ Calculating slopes, heights of structures, and distances for infrastructure projects demands a strong grasp of these trigonometric concepts․ Practice PDF worksheets, complete with solutions, serve as valuable tools for engineers to refine their skills and ensure accurate calculations, minimizing potential errors in project implementation․

Architecture also relies heavily on these angles for building design, ensuring structural stability and aesthetic appeal․ Determining roof pitches, window placements, and overall building dimensions requires precise angle measurements․ Architects often use practice problems, readily available as downloadable PDF worksheets with answers, to reinforce their understanding and apply theoretical knowledge to practical design challenges․ These resources aid in creating safe, functional, and visually pleasing structures․

Real-World Scenarios: Calculating Heights and Distances

Numerous everyday situations benefit from understanding angles of elevation and depression․ Determining the height of a tall building, a mountain, or even a tree can be achieved using these principles and a simple inclinometer․ Similarly, calculating the distance to an object across a river or valley becomes feasible with angle measurements and basic trigonometry․ PDF worksheets, often including detailed solutions, provide practical exercises mirroring these real-world applications․

These worksheets frequently present problems involving surveying, navigation, and even simple estimations․ For instance, determining the angle of depression from a lighthouse to a ship allows for distance calculations, crucial for maritime safety․ Mastering these concepts, reinforced through practice with PDF resources containing answers, empowers individuals to solve practical problems encountered in various fields and daily life, fostering a deeper understanding of spatial relationships․